Labels

Showing posts with label Cleaning. Show all posts

Mama's Little Helper

When my little buddy had been walking a month or two, he started trying  to do everything I did.  He especially liked sweeping, but such a long handle being waved around by someone without much fine motor control was a bit hazardous.  Luckily I had a small broom with an aluminum handle that I cut down with a bow-saw and popped the plastic top back on to the cut piece.  Perfect!  We jazzed it up with some stickers and my little buddy was just tickled.  He still gets it out frequently and helps me "seep".  Lately he's been wanting to help me "keen" the bathroom and dust, so I thought I'd encourage this while he was still small enough to think it is fun.  (He's about 20 months old now).  Maybe I'm the one that needs to look for the fun in cleaning...
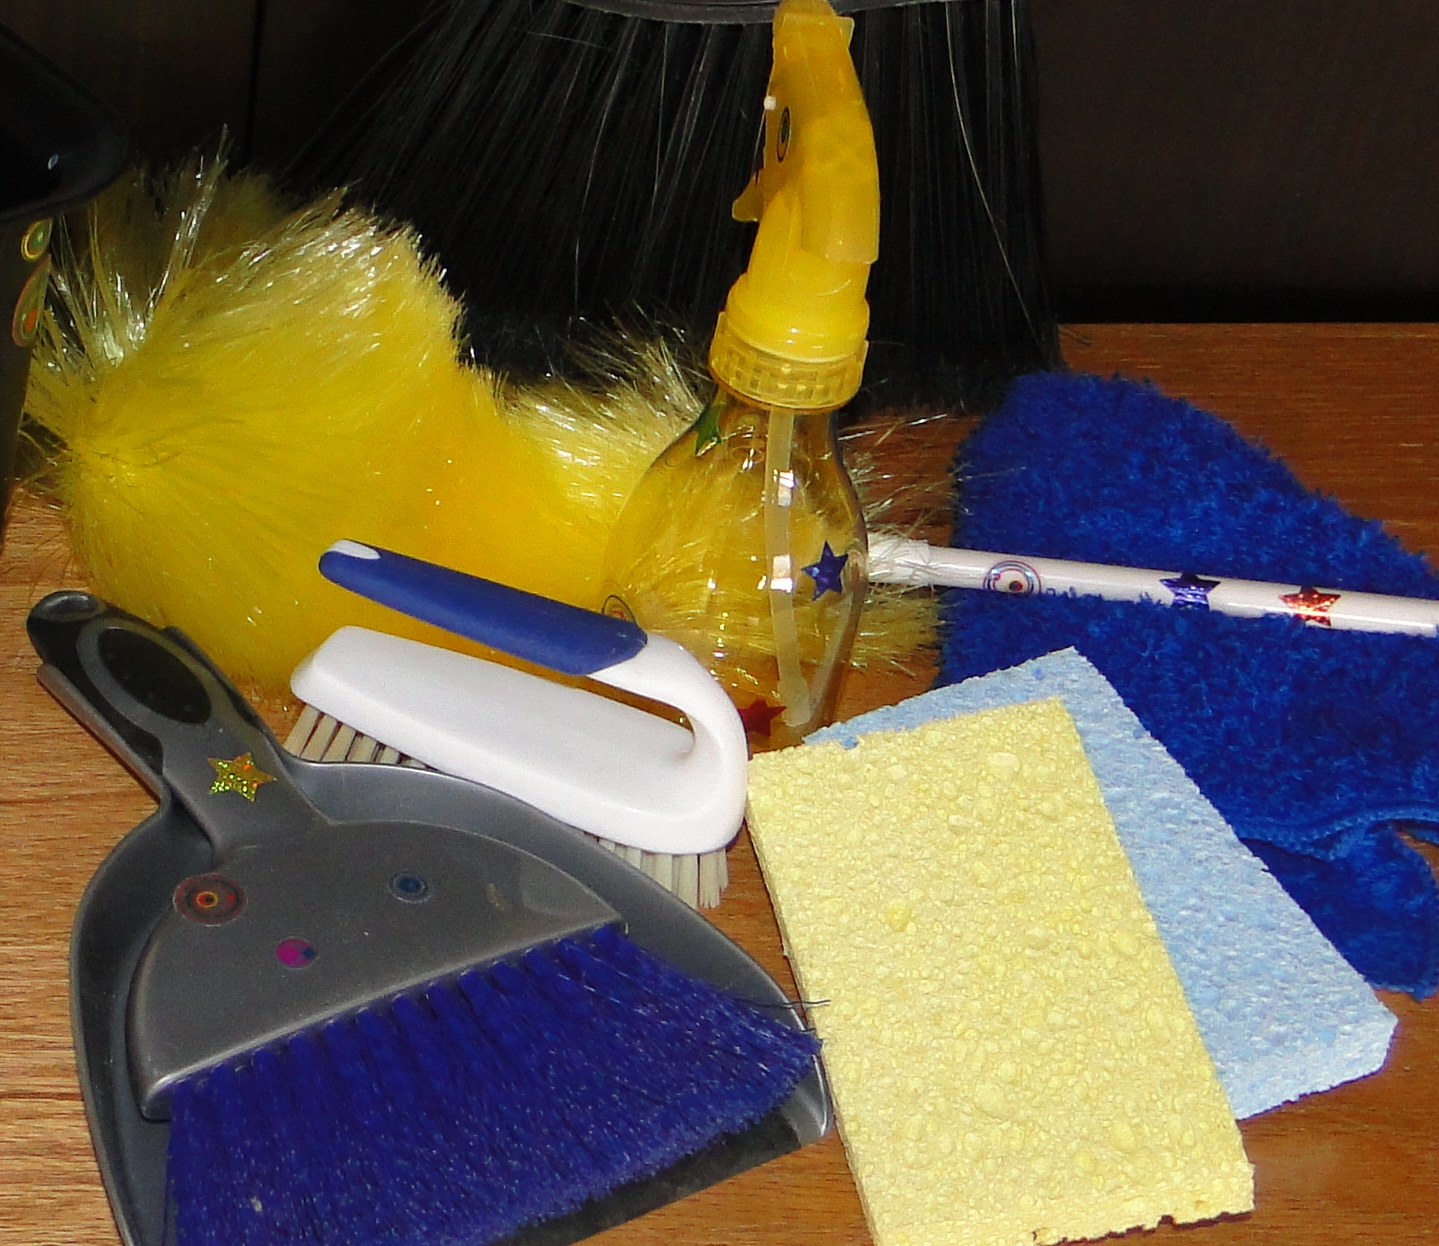
I made this little kit for him using mostly dollar store items, and things from around the house. He helped me stick stickers on everything, and we are good to go!  I haul around my cleaning supplies in a tote, so I found a basket he could use to carry everything-and it doubles as a place to keep his cleaning things when he's not playing with them.  I included a microfiber rag, scrub brush, dustpan, duster, a few sponges, and  a squirt bottle with a little water in it.

 
We'll see how the water bottle goes-it might be too tempting to squirt everything, but so far my buddy is pretty good about using things like this the way I show him.  The only problem I've had so far is with the dust pan.  He was "helping" me cook the other day and I didn't see him take a measuring cup and dip it in the sugar.  That went mostly on the floor as he went to dump it in the bowl.  I helped him use his dust pan to clean it up, and unfortunately it must have been way too much fun, because he now tries to head for the sugar when he has the dustpan.  I'm thinking I'll get out some paper punch dots for him to sweep up, or some pom poms until the sugar is forgotten.


I tried using a technique to transfer printed images to wood using acetone as described in this tutorial, but had limited success.  I ended up having to go over the image with ink and paint before I was happy with it.  Too bad, I was hoping it would work better, I have a lot of projects where I'd like to transfer my art to wood but it seems like it might be easier to just work on the wood. If any of you have a better technique I'd love to hear about it!


Here you can see how it turned out.  In the photo I'd started going over the lettering with a very fine-tipped permanent ink pen-a thicker one bled into the wood.

Operation Organize: The Housework File

One of the biggest causes of stress for me has been the struggle to keep up with housework.  I've been on a search to find a way to manage what I need to do, and I came across a great method at Organized Home where index cards are used to organize the seemingly endless list of things that need to be done to keep up a home.  The card file helps me rotate through chores that only need doing occasionally.  This way I don't feel guilty walking past a window that could use some cleaning, or that dusty ceiling fan-I know I'll get to it soon enough.  After using it for a few months, I've tweaked their system a bit as I've learned what works for me and what doesn't work so well.


Here is a quick summary of how to set up a card system:

First step: Inventory
Walk through your home with a notepad and write down every chore that needs to be done, regardless if it is one you have to do daily or one that only needs attention once a year or so.  Don't worry if you don't think of everything at once, you can add or take out cards whenever you like.


Second: Create Your File Cards
What to put on the card:  For each chore you listed on the notepad, take an index card and list the chore in the middle of the card.  Decide how often that chore should be done-I divided mine into weekly, twice a month, monthly, every 3 and 6 months, and yearly, and write that on the card-I put it in the top left corner.  I only have a few yearly cards, and it turned out each one of them should be done a specific time of year (like changing fire alarm batteries and getting the AC unit serviced) so I'm thinking I'll just keep those cards as a reminder to put them on my calendar.

  On the back of the card I make a note of the date when I get a task done. In the photograph above I put a few more things on the sample card that some people find useful, like the location, time to complete, or a checklist of things to be done to complete the chore (which makes it easier to delegate to other family members if you have help). *Side note:  "Cleaning the Family Room" can mean different things to different people.  What seems to be obvious to you sometimes needs to be written out.  I took a family relations course where the instructor asked everyone to draw a picture of a house.  She came up to me and said "No, you're doing it wrong!" and moved on.  She came back several times and said this.  I had no idea why my house was wrong.  Finally she came back and pretended to be frustrated "No!  All houses should have two windows, a door in the middle, and a tree!!"  We avoid a lot of frustration and conflict with family members if we explain that to us a clean family room consists of the following: Pick up toys.  Vacuum.  Dust, and Wipe finger marks off the TV.  They might feel they are done after picking up toys.  If a child (or spouse) has a checklist to check off portions of the task as they go, you'll both be more likely to be pleased with the result. 
Colored Cards: There were several options for using colored cards-at first I used colors for different types of tasks-white was for housework, blue for paperwork...but found I only had one or two colored cards.  I decided to use the card file for housework tasks only, and I ended up using colored cards for each area of the house.  This way I pull the cards I need to do for the day, and can quickly group them by area since I like to tackle one room at a time. 
Frequent Tasks: Organized home suggests writing a card for everything.  I started out with cards for daily things like sweeping, running the dishwasher, etc.  Some people really like the satisfaction of filing away cards, but I found it was just one more thing to keep up with.  I combined some tasks I always do together-like washing dishes then wiping down the counters and stove.  I ended up tossing daily and weekly cards and made a card for each day of the week where I write a reminder of some things I'd like to get done that day-like watering plants and paying bills on Monday, recycling goes out on Wednesday, etc.  I use Tuesdays to make sure the kitchen counters are clear and the living room is presentable. I've found I'm a lot more motivated to tackle deep cleaning tasks if I've got a fairly clean house to start with. 
One-time tasks: I made one card where I listed odd jobs-things that only need doing once like mending a screen or building shelves for the garage.  As I complete these, I cross them off the list and start a new card.  I try to get at least one of these done a week.  Most of these are fiddly little repairs that don't take much time-like that loose doorknob you only notice when you are heading out the door and don't have time to do anything about at the moment.
De-cluttering:  I have several clutter magnets around the home.  The worst are the top of the piano, and the chef's cart in the kitchen.  Once or twice a week I clean these off so it doesn't become a big job.
Organizing: Once a week, I pick one closet, shelf, or drawer and organize it.  Organized home suggests moving through your house systematically -starting in one room and each time you tackle another spot, work your way clockwise through the room, then move on to the next room, and eventually you get back to where you started.  I usually pull everything out, wipe or vacuum out the area, and organize everything as I put it back.  I take this time to say goodbye to things I don't use or need. I usually keep a laundry basket there and toss everything that doesn't belong there into the basket.  (Putting away these items needs to be part of the chore for me or it would just sit there...) Some bigger closets, like the one with my fabric and crafts, take more than one session.  I have a card where I note the location of the area organized and the date I last tackled it.


Third: Using the Cards
There are a few ways to use your chore cards.  I started out with the calendar system but just switched to a much simpler system.  Both are explained below. 

Calendar System:
Organized Home suggests filing the cards using a calendar.  An index file with month and days are used to divide the cards up evenly between the weeks, and as a chore is completed, it is filed back into the calendar according to when it should be done next.  Divide these evenly through the calendar.  Take the weekly chores and place them all in the first week on your cleaning days.  The monthly chores should be divided into four (or five) piles and each pile placed in each week of the first month, chores to be done every three months are divided up by the number of cleaning days in the first three months and so on.  I filed most of the chores on my heavy cleaning day, Wednesday.  Chores that were to be done on  a certain date or season were filed into the month they needed doing.  I used Organized Home's method of dividing up the days of the week so each day is set aside for certain tasks.  If you are interested in how I organize my week, my post where I explain it is here.


As you complete a chore, you file it to the next date that it should be completed on.  Weekly chores are put in the next week's date, the monthy chores one month away, and so on.  If you can't complete a chore, you make a note on the card and file it as if you'd done it.  If you've skipped it twice, you should tackle that chore before others the next time it comes up.

Pros:  This is highly organized and it can be satisfying to refile each card months away as you complete the task.  You can easily file cards that need to be done seasonally.  Looking at the cards daily was motivation for me to keep up on things.

Cons:  If you have a bad week and don't open your box...it can get complicated.  You can easily skip a chore or two and refile it, but A whole week of traveling or being sick throws it all off, and I had to unpack the files and re-divide them several times. This got old.

Rotating System
Instead of filing the cards into specific dates, I have one divider for each group of chores based on how often they need doing.  I then figure how many chores I need to finish that week in order to cycle through the whole pile within that time frame.
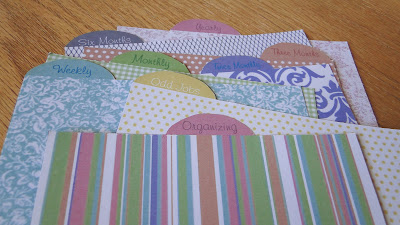
I've set aside every Wednesday for heavy cleaning, and Fridays for lighter cleaning.  When using the cards, I go through as many of the chores as I can on Wednesday, and finish the pile on Friday.  I've found I'm a lot more successful if I get all my weekly chores done on Tuesday-things like mopping and vacuuming, so I have a clean (ish) house to start with on Wednesdays.  It is easier to do things like wash windows if I'm not looking at sticky spots on the kitchen floor.
I have sixteen monthly chores, which need to be done every four weeks.  That means I needed to do four a week to rotate through all of them by the next month.  I had nineteen that need to be done every three months, which means I have twelve weeks to do them all.  If I do two a week, I'll cycle through them in less than three months, but I figure that will make up for an off week now and then.  I figured I'd use any fifth Wednesdays to catch up on odd jobs.  I ended up needing to do four monthly chores, two three-month chores, and one six month chores.  Chores that need to be done at a specific time of year will go into my planner instead of the file.
I ended up with the following task list for each week:
-Four Monthly
-Two 3-Month
-One 6-Month
-Organize one closet, shelf or drawer
-Do one odd job
As a job is completed it is filed at the back of its section.  If you don't get to it, you just leave it where you'll pull it next week.

Pros:  If I have an off week, I just pick up where I left off instead of having to refile everything.  It is a simpler system but still gets the job done.

Cons: I haven't noticed any so far.  I'll keep you posted :)

Fourth: Don't Get Discouraged!
Depending on how clean things were to begin with, it may take a while before your home is to where you'd like it to be.   I still get frustrated that it takes hours to clean the kitchen, and only 15 minutes to make it look like I haven't touched it in a week.  That's when I put on my martyr hat and start over :)  At least the living room...oh.  Nevermind.  It helps me to focus on the positive-every window you wash, every drawer you sort through, gets you closer to your goal.  At least I have a plan now, where before I'd just go hide in a book.

Again, I suggest you visit Organized Home.  I found it very useful, even if I ended up using a modified version of their system.  They may have suggestions that would work better for you.  In addition to the housework organization file, they have tons of other ideas, and they even have a holiday version of the card file to keep track of everything that needs to get done for the holidays! 
(I am not affiliated with Organized Home in any way, I'm just a big fan!)

Homemade: Review of Homemade Dishwasher Powder

Last week I posted a review of homemade laundry detergent, to see if it was cost effective and able to clean clothes as well as commercial products.   I thought I'd try homemade dishwasher detergent since the basic ingredients were the same.
Rather than post a long list of similar recipes, I thought posted a basic recipe and list optional ingredients separately.  The recipes I found all included Borax and washing soda, usually in a 1:1 ratio.


Basic Recipe
  • 1 cup Borax
  • 1 cup Arm and Hammer Washing Soda.

Optional ingredients:
  • 1/3 cup Epsom Salts 
This ingredient serves as a water softener, one recipe called for Kosher or pickling salt which is similar to table salt, but lacks the iodine, and usually has coarser crystals.
  • 1 package powdered lemonade 
This is added because it is a cheap source of citric acid, which will help with hard water residue.  These should be the packets where sugar has not been added yet.
  • Dish Soap: NOT recommended.
Some recipes suggest adding a few drops of liquid hand-washing dish soap, however most dishwasher manufactures STRONGLY recommend against using any soap that suds.   
  • Essential Oil
A few drops for the smell, though if you are adding the lemonade, it shouldn't need any.

Rinse Aids:
  • Fill dispenser with white vinegar, or pour a cup in the bottom of the dishwasher.  This helps with hard water residue.
  • Lemi-Shine: mostly citric acid, but it worked wonders removing hard water residue on my cups when vinegar just couldn't do the job.
Directions: use one tablespoon per load, two if you have hard water.

Notes:  
  • Film on Dishes: Many people complain of a film on their dishes after switching to homemade powder.  This film is caused by minerals from hard water being deposited onto the dishes and dishwasher, and is not leftover detergent.  I have VERY hard water, and had this issue while using commercial dish-washing powder.  Using a bit more detergent helped, as did adding vinegar in the bottom of the dishwasher, but I still ended up having to wash many of my glasses and plastic-ware with vinegar to get the deposit off after a while.  My sister suggested Lemi-shine, and using this to replace some of the detergent about once or twice a week has made a huge difference in how much film is on my dishes. I expect to need to use Lemi-shine.  I'm not trying to advertise a particular product, but so far I haven't seen a generic brand works for me.
  • Want a higher yield recipe? 4 lbs borax (equals about 11 cups), 2 3lb 7oz box washing soda (one 3lb 7 oz box is about 5.5 cups), 3 cups Epsom Salt, 24 (yes, the recipe I saw said 24, I'm not sure you need that much, see what works for you) packs of lemonade powder.
  • Where can I get the ingredients?  I found both borax and washing soda in the laundry aisle at my supermarket and at Walmart. 
  • Clumping?  Homemade dishwasher detergent tends to settle into clumps.  Stirring or shaking the container each time you use it is supposed to help, as does storing it in an airtight container.  I noticed clumping beginning after a few days, and I live in a very dry environment.
  • Is Borax Safe to use on dishes? According to the product's website, using borax in the dishwasher is one of the intended uses. I wouldn't eat it, but I figure it will be rinsed off enough to not cause problems.  Yes, you can kill ants with it-a little borax mixed with honey has solved a lot of kitchen ant problems for me, but the logic that borax kills ants, therefore it is a pesticide, therefore it is toxic to humans, makes some assumptions that I couldn't find scientific basis for.
To sum up: My water is so hard I figured I'd add the salt and lemonade, just to give the homemade powder a fighting chance.  I didn't figure in the cost of using Lemi-shine since I have to use it either way, though I should note that I need to use it now every wash, instead of once a week.  Surprisingly, the cost per ounce was slightly higher to make my own powder than it was to buy an expensive brand. It was somewhat effective in cleaning, it leaves a film on some dishes, especially plastics, and doesn't seem to remove food as well as the commercial powder I usually use.
Will I make it again?  No.  The reason I was interested in making homemade dishwasher detergent was to save money.  Unless I can find the ingredients for a significantly lower price than I did, I will go back to using commercial powder.


Price Comparison:
 
Homemade Dishwashing Detergent
Cost
Ounces
Cups
Tablespoons (Loads)
1 - 4 lb 12 oz box Borax
$2.98
76
11
110
2 - 3 lb 7 oz boxes Arm & Hammer Washing Soda
$6.48
110
11
110
3 Cups Epsom Salts
$2.22
33
3
30
24 - 0.23 oz packets of powdered lemonade
$4.00
5.52
0.25
2.5

Total Cost
$15.68

Cost per Ounce
$0.07

Cost per Load (double for hard water)
$0.06


4 lb box Cascade Complete 4 in 1
Total Cost
$6.97

Cost per Ounce
$0.06

Cost per Load
$0.06

Effectiveness:

I am having a problem with the film others complained of.  It seems worst on plasticware.  I tried a few loads without Lemi-shine to see how it would go, and I had to re-wash a lot of the plastic as the film built up over time.  Using Lemi-shine and adding vinegar to the rinse dispenser helped, but not well enough to satisfy me.


Update:  After several weeks of using this recipe, I am increasingly dissapointed by how ineffective it is.  The slight film builds up over multiple washes even using Lemi-Shine and vinegar unless hand washed with soap...and that to me is a dealbreaker.  I'd ignore it but the film tends to build up on my baby's dishes the most.  I've also noticed more food is left behind than when I used commercial powder, and I don't think I can blame hard water for that.  I've gradually increased the amount of powder until I put three tablespoons per load hoping that would help, I'm using vinegar as a rinse, and I'm using two or three tablespoons of Lemi-shine a load (which is a lot more than I used to use, and that stuff isn't exactly cheap).  I'd really hoped to give you a glowing report about how well it cleaned and how much cheaper it was, but now I'm wishing I hadn't made so much of the stuff.  I think my only solution is to use the homemade powder for the pre-wash, and use commercial powder for the main wash until it is gone.  Hopefully if you make it you have better results.  I'm including a few pictures of the film. 
I washed half of the green cup to show the film better.

Homemade: A Review of Homemade Laundry Soap


In an effort to be more frugal, I've decided to test the affordability and effectiveness of some homemade products. Powdered homemade laundry detergent seems to be highly praised, so I thought I'd start with that.

Most homemade laundry detergent recipes are similar, so I researched the ingredients to find out why they were added to the recipe. It turns out there are three ingredients that are nearly always included, and several ingredients that are optional. Instead of posting all the recipes I found, I posted a general recipe you can adapt if you decide to make your own.

Recipe for Homemade Laundry Detergent:
Necessary ingredients:
  • 1 cup Borax (Cleans, disinfects, and softens water).
  • 1 cup Arm & Hammer Washing Soda (This is sodium bicarbonate, and alkali salt that breaks down grease and dissolves stains. It softens water by binding with chemicals that cause hard water, allowing the detergent to form more suds and work more effectively).
  • 1 bar of Fels-naptha soap, Pink Zote Soap, Kirk’s Castile unscented soap, or Ivory Soap, just don't use something heavily perfumed. (Cleans).

Optional Ingredients:
  • 1 cup Oxyclean or store brand oxyclean
This is a mixture of washing soda and powdered hydrogen peroxide. The baby version only has these two ingredients, the regular mix has some detergent added. Some people complained of whites gradually getting dingy with homemade detergent. This will counteract that. Some people opted to just add a scoop to whites and loads that were especially grubby to save money.
  • 1 cup box Arm & Hammer Baking Soda
Some recipes include this as a whitener and to make it smell nicer, it also softens water.
  • White Vinegar
Some people claimed using this as a rinse helped remove buildup of hard water residue and killed a musty odor others complained of. Some didn't like the strong smell of vinegar and suggested an extra rinse cycle to get rid of the vinegar smell, though other sites claimed the vinegar smell disappeared after drying. My machine isn't programmable and I'd have to babysit the machine to be able to add the vinegar, if I end up having to do this, it will probably be a deal-breaker for me. Stiff towels are a good indicator that you have too much detergent residue left after the wash.
  • Calgon Powder
This was also suggested as a solution to the buildup of hard-water residue, the suggested amount was around1/2 cup but amount may need to be increased based on how hard your water is.
  • 1/4 cup Cascade dishwashing detergent per load
This detergent contains an enzyme that helps break down protein stains.
      • A few drops of essential oils
      This makes it smell pretty-the favorites are usually citrus or lavender.

      Directions:
      Grate or shred soap with cheese grater or food processor. Mix all ingredients together, and use one-two tablespoons per load using the directions on your machine. This soap can be a little slower dissolving in water than store-bought soap, so it works best to put the soap in the machine and start the water before adding clothes.

      Notes:
      Hot or Cold? Some sites claimed using hot water was essential when using homemade, others claimed cold worked fine, still others claimed you only need hot water for whites. Detergents begin to lose their effectiveness below sixty degrees either commercial or homemade.
      Hard Water? If you have hard water, you will need more detergent-this is true of store-bought detergent as well.
      High Efficiency Machines? I do not have a high-efficiency machine, so I am not aware what special needs these machines have. Some claim that this is not a high-sudsing recipe, so it is ok, but I don't have enough knowledge on this point to make recommendations.
      Pre-treating Stains? Some sites recommend rubbing stains with the Fels-naptha soap, others suggest using Dawn Dishsoap. I haven't tried either method. I think for now I'll stick to presoaking in water and Oxiclean. If I end up testing pre-treatment methods, I'll post the results. I have to pretreat stains for my regular detergent anyway so I don't think it is a reflection on how well this recipe works.
      Want a larger yield recipe? 4 lbs borax (equals about 11 cups), 2 3lb 7oz box washing soda (one 3lb 7 oz box is about 5.5 cups), 11 bars soap.
      Where can I get the ingredients? Most larger supermarkets have these ingredients. I found everything at our small Walmart, though the only bar soaps available there were Fels-naptha soap and Ivory.
      Shredding the soap? Some people complain of the tediousness of hand-shredding the soap, but others said it was no big deal. The soap I was shredding was a little hard to shred by hand-I could have done it but after a few minutes I decided to just do in in the processor. I tried both of the options my little food processor offers, the shaving option came out looking like grated cheddar, the cutting option made it little pea sized lumps. I was hoping for more of a powder to make it easier to mix everything together. I ended up going with the cheese curls, then chopping those down. I think Ivory would powder up better. I don't think shape matters much with effectiveness unless you have chunks too big to dissolve during the wash.

      I tried to anticipate your questions, though this is my first attempt at making the soap. I'll try to answer any other questions you may have, but this is my first attempt too. In a few months, after using up this batch, I will post an updated review. Thanks!

      To sum up:
      When I added everything up, the cost is nearly the same as cheap commercial laundry detergent, and about half that of the nicer brands. If you shop around and find the ingredients at a low price, and use a less expensive bar soap, you may be able to cut the cost of making your own even further than I did. I haven't figured out how to get the $0.01 per load that some makers of their own soap got.
      Homemade worked just as well as store bought, and worked even better when Oxyclean was added. Will I make it again? I was really hoping the cost difference would be greater. I would definitely switch if saved me more money, it was easy enough to make, especially using a food processor, and it does the job.


      Price Comparison:


      Homemade Laundry Detergent
      Cost
      Ounces
      Cups
      Tablespoons (Loads)
      1 4 lb 12 oz box Borax
      $2.98
      76
      11
      110
      2 3 lb 7 oz boxes Arm & Hammer Washing Soda
      $6.48
      110
      11
      110
      11 5.5 oz bars Fels-Naptha Soap, grated
      $10.67
      60.5
      5.5
      55


      Total Cost
      $20.13
      Total Ounces
      246.50
      Cost per Ounce
      $0.08
      Total Tablespoons (Loads)
      275
      Cost per Load
      $0.07


      Regular Tide Detergent 169 oz box, 120 loads

      Total Cost
      $20.47


      Cost per Ounce
      $0.12


      Cost Per Load
      $0.17


      Regular Sun Detergent 85 oz box, 80 loads

      Total Cost
      $4.98


      Cost per Ounce
      $0.06


      Cost per Load
      $0.06


      I added the package totals together to get the total ounces, then I figured ~10 tablespoons detergent per cup, about 27.5 cups for a large batch, so about 275 tablespoons. This is a pretty rough estimate since I didn't measure the amount of detergent precisely, I just wanted to get an idea if the cost was comparable. Ivory Soap was $4.27 for a pack of nine bars, if you used that, your cost would be a bit less.

      Effectiveness:
      Here are the images of the results (apologies for the quality):

      Now, I wasn't expecting stains like these to come clean completely, but I thought it was a quick way to compare cleaning ability. I took some white cotton cloth, and stained strips with soil, ketchup, grass, driveway oil puddle, and soy sauce. I made mini stained quilts and soaked two of them in Oxyclean water for about two hours. Then I washed one the pre-soaked, and one of the un-soaked in two seperate loads. I used hot water for both loads, and added Oxyclean to both loads because I wanted to keep it as close to the way I normally wash as possible. I but added the reccomended amount of Sun brand detergent to one load, and two tablespoons of homemade detergent to the other load. Thinking back I should have made one more and washed it in water for a control. Does your kid need a science fair project?
      I was a little surprised at the results. The winner? Presoaked + Homemade. The looser? Unsoaked Homemade. For some reason, combining Oxyclean presoaking with the homemade detergent yeilded the best results. I was also a bit surprised that the presoaking didn't make as much of a difference as I thought it would, I guess the Oxyclean I added to the wash did nearly the same job as presoaking.
      I'd like to do this test again, without the oxyclean in the wash at all, and try it with a more expensive commercial brand.

      Pretreating Stains:
      Of course I'll have to pretreat stains using homemade detergent, just as I do with store-bought soap.
      Let me explain, no, there is to much. Let me sum up:
      • Work fast if possible, fresh stains come out more easily.
      • Avoid rubbing stains with bar soaps, many stains can be set in by doing this.
      • Avoid heat: if the stain doesn't come out with the first wash, don't put it in the dryer, re-treat and re-wash.
      • Pretreat with a stain remover that contains enzymes if the stain is a protein stain like blood or grass.

      Here is a good site on removing stains.

      How to Hack your Swiffer (Because You are Thrifty, or because You are Trying to be Environmentally Responsible)

      I was given a Swiffer Jet mop. It is a lot more convenient than mopping, but I have a hard time paying for the disposable pads and solution. I usually use three pads each time I mop, and it adds up. I'm not terribly fond of their cleaning solution either, it always seems to leave a film on the floor.

      After a little research I found it is easy to make this device more economical and cut down on waste.

      You need a Swiffer Jet or similar wet mop, microfiber cloths, pliers, and a sewing machine or serger.


      When I first got the mop I tried to figure out how to refill the bottle but had given up. It turns out you just need some pliers to give you enough grip to twist the lid off. The first time I tried it the lid came right off, but the second time I refilled it the lid didn't come off as easily, but I got it off eventually. I'm not sure why. Once the lid is off, you can refill it with your favorite floor cleaner, or just use a vinegar-water solution. (If you have hardwood floors, make sure your solution is safe to use on them).

      I bought the thickest microfiber cloths I could find at the dollar store and used an original pad for a guide as to how to fold it. It doesn't matter much if it's a little bigger than the original pad.

      I folded it so the edges were inside, and I surged the sides to hold it together.
      My Swiffer has some Velcro that holds the pad on, if your mop doesn't have this, you could sew some elastic to the pad to hold it to the mop. Microfiber sticks well to the Velcro, but you could use elastic to hold a pad made out of other fabrics, like old towels to the mop.

      The homemade pads are machine washable, and you can flip them over once one side gets dirty. After testing the new pads, I decided to sew across the pad a few times to keep all the layers together. The microfiber worked so much better than the disposable pads ever did, and I only ended up using one (flipping it over once) instead of the three disposable pads I usually use.

      I'm feeling so thrifty and eco-friendly right now! Now I just need a steamer mop...

      Wool Dryer Balls

      I saw some wool balls that were supposed to cut at least 25% off the drying time if you put them in the dryer to roll around with your clothes. The tutorial said to make a yarn ball and then felt it.

      You need a yarn that will felt, it will usually say it can be felted on the label. If it doesn't then you can assume 100% wool yarn will. (Another tutorial I found didn't use yarn at all, but used wool batting. I'll get some and try it, then post the results here.) The wool yarn I found was a bit pricey for me to make several balls out of it at $5 a skein, so I dug around in my craft stash for some wool remnants I'd used for some needle felting. The bits I had left over were just some matts and little snips that were left over after wool was carded, and though I'd been able to use a bit here and there for needle felting, I was about to toss it because I thought it wasn't any good. It turned out to be perfect for the core of a dryer ball!
      The snippits of wool wouldn't roll so I just matted it together into the toe of a nylon sock and tied it off. You can hand felt it like this, or do it the easy way. I plopped them into a pillowcase and tied it shut, then ran it through a load of laundry. I wasn't sure it would felt well since some of the bits were so short, but it held together well enough that I could move on to the next step. The picture shows the raw wool, the nylon sock that has gone through the wash (the fuzzies on the sock are good, they mean the fibers have worked their way out and the inside is probably nicely felted.) Just peel away the sock and you have something like the felted balls on the right.

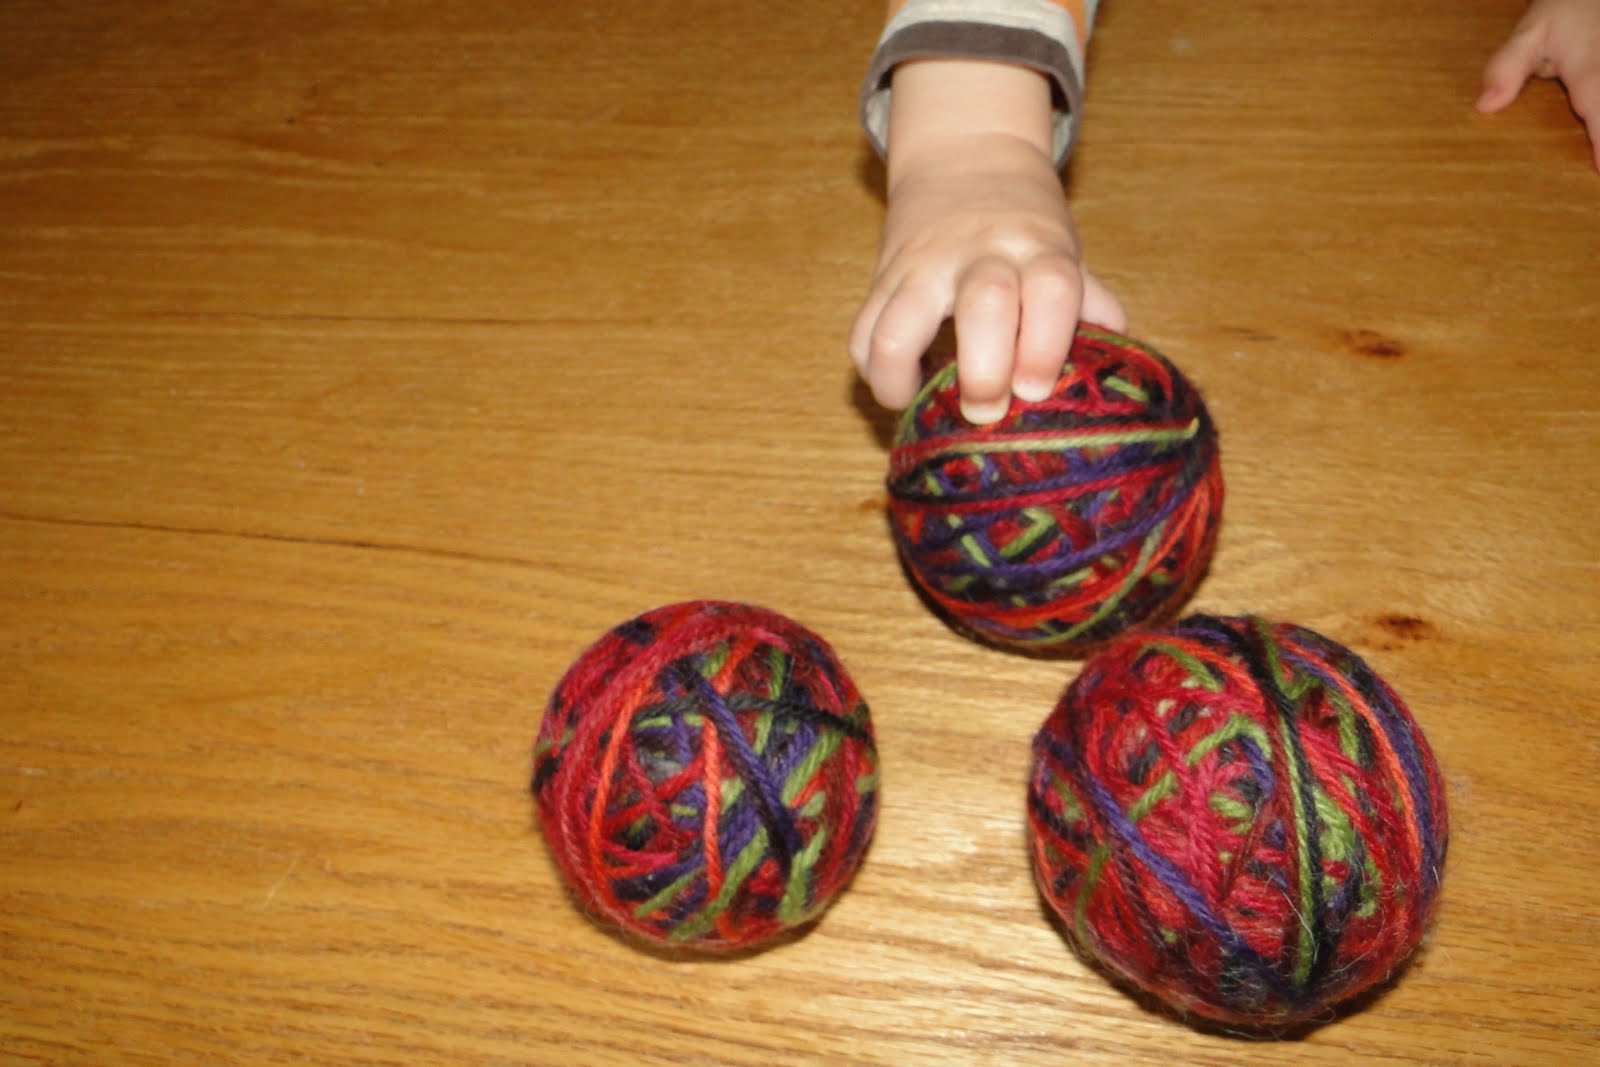
      I took my wool yarn and wrapped it tightly around the felted core. I only wrapped enough around it to cover the felted ball, then tied off the yarn. This way I got the yarn to last for nine balls.


      I put the wrapped balls back into the nylon and ran it through another load of laundry. I wasn't sure if you were supposed to take it through the drying as well, so I did, and it seemed fine.


      The yarn felted to itself and will continue to felt more as it is used in the dryer so as long as it felted enough to hold together for now it will be fine.
      Most people use four or six balls per load, I figure with nine, I have enough to alternate between loads, and have a few to spare for my little buddy, who found them irresistible. I might just have to make a few just for him, they are nice and lightweight and wouldn't do much damage if thrown.


      If you'd like to see a tutorial on making these using wool yarn, try this one at Good Mamma.

      Update:
      After doing several loads of laundry using the dryer balls, I'm pretty impressed. My loads are done in 30-40 minutes, where I'd previously set it at 50-60 minutes. Maybe I was overdrying it before, it would be nice to test these in a dryer that shuts off when the clothes are dry. I had two balls unravel a bit, but I think it was my fault for not tying the yarn off well, and it was easy to tie them off again.

      Another little tip: Put a few safety pins on two of the balls to cut down on static.