Labels

Showing posts with label Sewing. Show all posts

Toy Box

For Christmas some of my siblings wanted to give our mom a "Grandma's Toy Box".  My contribution was to paint the exterior, and then I sewed some canvas bags to hold some of the toys with lots of pieces. 


The canvas bags have a basic shape drawn on them with a permanent marker to so even kids who can't read yet know what is inside without dumping them on the floor.  The toys shown are all from Ikea...love that place!


For safety, we installed some brackets that keep the lid from closing too fast.  This was a must since the lid was heavy.

Sherpa Bomber Hat and Gloves

I've been wanting to make my little buddy a bomber hat when I found some great Sherpa microfleece last year.  I've been searching for a simple bomber hat pattern I could use and finally found one at Delia Creates.  I followed her pattern measurements, and it just fits my son's 18 1/2 " head.  It probably would have been nice to cut it a bit larger-but I figure it will fit him until we are out of the cold weather.  Since the Sherpa fabric was fleece on one side and microsuede on the other, I didn't line the hat, and sewed most of the seams so they were on the outside.  I like the look of the fleece peeking through.  I rolled the fleece and sewed it down so the bottom edges would look more finished, and I did the same to the brim before attaching it.  Since I didn't have to sew the lining, it worked up very quickly!  I do like how it comes low in the back to cover his neck, and his ears will stay toasty warm.  I left off the ties for now, but I'd like to find some matching twill tape to sew on so I can tie the flaps up if I want. 
I thought he should have some matching mittens so I deconstructed a mitten to create the pattern for the ones in the picture.  I did make a lot of changes to the mitten pattern, so I think I can post that for you without problem.
 Now I just need to make him a jacket, scarf, boots, pants, and goggles!


Na Na Na Na Batman!

 I made this apron for my sister's birthday after seeing a similar one-and now I need a Wonder Woman one for me!

I didn't find a pattern quite like I was looking for, so I made one up.  The pattern below shows the size and colors to use-I used black but many of the classic batman costumes use a deep blue instead of black.

Here are some quick instructions-I didn't take photographs while sewing it up, but it should be fairly straightforward...I hope.

1.  Cut fabric pieces.  I've allowed for a 3/8 " hem, but you could use a smaller hem if you like, there aren't many places where it would create a problem.

2.  Take the gray piece, and press a 3/8" hem along one of the 15" sides.  Pin it to one of the black top pieces so the bottom and sides line up, and the pressed hem is folded inward and is at the top.  Clear as mud?  Good.  Topstitch the gray along the pressed hem with gray thread, and baste the sides together closer to the edge than 3/8".  (If you intend to sew the logo on rather than fusing it in place, attach the logo now.  See step 8.)

3. Pin the black top pieces right sides together so the gray piece is on the inside.  Sew around the sides and top, leaving the bottom open.  At the top, narrow your hem to form a point. Trim and clip seams to make turning it inside out easier. Turn it inside out and press.  Topstitch with black thread close to the edges.

4. Sew the two sash pieces together to create a (nearly) 90" long piece.  Press seam open.  Fold the sash in half so it is 90" long and 4" high, with the open edge on the outside.  Sew one short edge, and the long edge of the sash, then turn inside out through the open end of the sash. Fold in the raw edges of the open end of the sash and sew closed.  Press.

5. Hem two short sides and one long side of the apron skirt.  Gather the top of the skirt so it is 15 " wide.

6. Fold in the raw edges of the top.  Press.  Insert gathered edge of skirt about 3/8", adjusting gather to fit if needed.  Pin in place, then topstitch over all layers to attach skirt to top.  (Don't worry if the front seam is perfect, you'll be covering it with the sash.

7.  Pin center of sash to apron, so lower edge of sash is slightly below where the skirt meets the top.  Topstitch in place using black thread, and add extra seams to form the "utility belt"  If you wish the lines to be darker than mine are, you could use a zigzag or satin seam.

8.  I'll leave replicating the logo to you, I just found an image to use as a template and layered the black, yellow and black together with strong fuseable interfacing, then fused it to the apron.  I considered topstitching the logo to the apron, but that really should have been done when the gray was attached so the seam didn't show on the back.  I also decided I liked the clean look the interfacing gave.

*tip-when using double sided fuseable interfacing, it is a lot easier to cut the shape after fusing a slightly larger piece of interfacing to the fabric.  Fuse the interfacing to the wrong side of the fabric, and keep the paper on while cutting the shape.  Remove the paper just before attaching it to the next layer.  If you cut the fabric first, you'll get a mess when the iron touches the exposed interfacing, and if you cut the interfacing first, I've found you don't get as clean of a cut.  Start with the biggest shape first and layer up, then fuse the finished logo to the apron.

9.  To finish the top you have a few options.  You can create strips of a contrasting color (gray or yellow will help the "ears" stand out) and use D rings to create an adjustable neck loop.  You can also use a piece of elastic as I did here, and just sew it to each tip, creating the proper height of neck loop.  This didn't work out so well though-it fit me fine but my sister is a bit shorter and it would have worked better to attach a hook and loop to the tips.  That would have made it fit her torso better.

Hope you have fun with this!  I'd love to see any you make-especially if you go for other superheroes!


Homework Stations


There is no quick and easy way to get kids to do homework, but these stations might eliminate some of the excuses and avoidance tactics kids sometimes use.  In addition to being portable, they are fun and easy to put together-you certainly don't have to dress them up as much as I did-but I don't have girls, so I love the excuse to make something girly once in a while.


Some things I like about this idea:
  • All supplies are in one place.  No more "I can't find a pencil!  I need glue!" and so on.  This prevents the child from having to embark on the dangerous supply safari, from which they may never return...
  • The sign on the front flips back and forth between "Working on it!" to "I'm done!".  This may be an incentive in itself for some kids.  It also allows the parent to see how it's coming without having to nag as much, shifting the responsibility for making sure it gets done more to the child.
  • There is now a specific place for homework to be deposited when it comes in the door, and a place to leave it when it's done out of the dog's reach.  If used regularly, it will become a habit to check their station for completed homework as they head out the door. 
  • I always work better when things are organized-and cuteness makes me want to use it even it if it's for a task I'm not looking forward to all that much.  I think the same applies for kids.  
  • This idea is easily customized to fit the needs of your child, any box or container from a decorated cereal box to a little basket will work.  Just fill it with supplies that are used often, and decorate it up with something the child likes.  Involve the child and they'll be even more likely to use it.
Filling the crates:
I color-coded the baskets and items in the baskets so each girl knew who the item belonged to.  In addition to a pencil case full of things like scissors, glue sticks, colored pencils, pens etc.  I added a ruler, and a blinged-up monogramed notebook.  The cover is removable so the notebook can be replaced as it is used up. If the girls had been older, I might have included a calculator and calendar. 


To make the crate liner:
I used some mini milk crates that were going for $1 during the back-to-school sales.  They were ok, but I wanted to line them to help contain items, and to spiff them up a bit.  These instructions include dimensions for the mini crate I used, but can be used to make a liner for most straight-sided containers.  If you want to line a basket that narrows at the bottom and don't know how to adjust the pattern, make a straight-sided liner based on the widest point, then insert the liner into the container with the seams towards you.  Pin the seams to fit your container, and re-sew the seams.  Do this before hemming the liner or inserting elastic.

1. Measure the opening of the container you want to line.  The mini crate I used had an opening of 8x6 3/4".  Halve both measurements, and in the corner of a piece of tissue or larger paper draw a box using these dimensions (mine was 4x3 3/8").
2.  Measure the height of the interior of the container.  The mini crate I had was 6" tall.  Extend both lines by that amount.
3.  Draw a line parallel to the height lines to form your seam allowance line.  I put my seam allowance at 1/2".

4. To allow yourself enough give in the fabric so you can wrap it over the top, lay a ruler between the corner of the box and a point about 1/2 inch short of the end of the height line.  Extend the seam allowance line along this angle for about 3", or more if you'd like the fabric to extend down further.  Remember to allow an extra 1/2 inch or inch for hemming. Repeat for the other corner.  Extend the line back to the edge of the paper to complete the pattern.

Your completed pattern should look similar to this.
5. Cutting: fold the fabric in half, then in half again.  Position the corner of the pattern over the corner of the fabric, then cut. (I bought some fat quarters to use for this project, but found they are slightly too small.  Oh well, more for the stash).
6.  Fold fabric so two adjacent cuts are together, and sew.  Repeat for each side, so your fabric forms a box.
7.  Trim extra fabric from the corner and press seam open.Check fit at this point.


7. Create a rolled hem around the top by folding the fabric over 1/2 or 1/4 inch, depending on how thick you want the hem (be sure to allow enough room to thread your elastic through).  Fold over again, press and sew.  on the corners, create a rounded corner by rolling it as shown in the photo.  Trim extra fabric at the corners if needed.  If threading elastic through the hem using a safety pin, leave one opening, if using a threader (I love these!), leave another opening halfway around.  The corners can be a bit tricky to thread elastic through, so if you keep all the folds going the same direction it helps.  Another option is to set your machine on a zig-zag the same width as the elastic, and sew the elastic to the inside edge of the fabric, pulling the elastic taut as you sew to create a gather.  The unfinished edge can be hidden by ric-rac or ribbon once it is on the container.

8. Measure elastic length by wrapping it around the exterior of the container, and cutting it about 3 inches short depending on the give of the elastic.  You should be able to take the cut piece and stretch it around the box without it being too taut, but having enough give to overlap the ends about an inch.
9.  Thread elastic through the hem and sew ends together.  Finish hem by stitching the opening.
10. Place liner into container and adjust the gather so it is even.


The finished boxes are ready to decorate!

How to Hack your Swiffer (Because You are Thrifty, or because You are Trying to be Environmentally Responsible)

I was given a Swiffer Jet mop. It is a lot more convenient than mopping, but I have a hard time paying for the disposable pads and solution. I usually use three pads each time I mop, and it adds up. I'm not terribly fond of their cleaning solution either, it always seems to leave a film on the floor.

After a little research I found it is easy to make this device more economical and cut down on waste.

You need a Swiffer Jet or similar wet mop, microfiber cloths, pliers, and a sewing machine or serger.


When I first got the mop I tried to figure out how to refill the bottle but had given up. It turns out you just need some pliers to give you enough grip to twist the lid off. The first time I tried it the lid came right off, but the second time I refilled it the lid didn't come off as easily, but I got it off eventually. I'm not sure why. Once the lid is off, you can refill it with your favorite floor cleaner, or just use a vinegar-water solution. (If you have hardwood floors, make sure your solution is safe to use on them).

I bought the thickest microfiber cloths I could find at the dollar store and used an original pad for a guide as to how to fold it. It doesn't matter much if it's a little bigger than the original pad.

I folded it so the edges were inside, and I surged the sides to hold it together.
My Swiffer has some Velcro that holds the pad on, if your mop doesn't have this, you could sew some elastic to the pad to hold it to the mop. Microfiber sticks well to the Velcro, but you could use elastic to hold a pad made out of other fabrics, like old towels to the mop.

The homemade pads are machine washable, and you can flip them over once one side gets dirty. After testing the new pads, I decided to sew across the pad a few times to keep all the layers together. The microfiber worked so much better than the disposable pads ever did, and I only ended up using one (flipping it over once) instead of the three disposable pads I usually use.

I'm feeling so thrifty and eco-friendly right now! Now I just need a steamer mop...

Temporary Sandbox


Problem: Our backyard isn't so toddler friendly at the moment, so I thought a little sandbox would give my little buddy something to do while I worked back there. We aren't ready to put something in permanently and I wanted something cheap but functional until then.

Oh, did I mention we have a cat problem?

We have a cat Problem. There is a feral colony that gets fed at the vacant trailer behind us. I have yet to convince the cats my square-foot garden isn't just a glorified litter box, and the last thing I wanted was buried treasure in this sand, so the number one priority of a sandbox was that it has a lid.

This is what I came up with:
Smallest kiddie pool at K-mart: $8.00
Sand: free from the side of the road. We have a lot of fine grain sand here!
Cover: $2.00 for the doohickie that holds the string tight. The waterproof fabric was from Freecycle (yeah Freecycle!)
Little Buddie's smile: Priceless!


If you were wondering how I made the cover, I laid out the fabric and traced around the upside-down pool about five inches out from the edge.
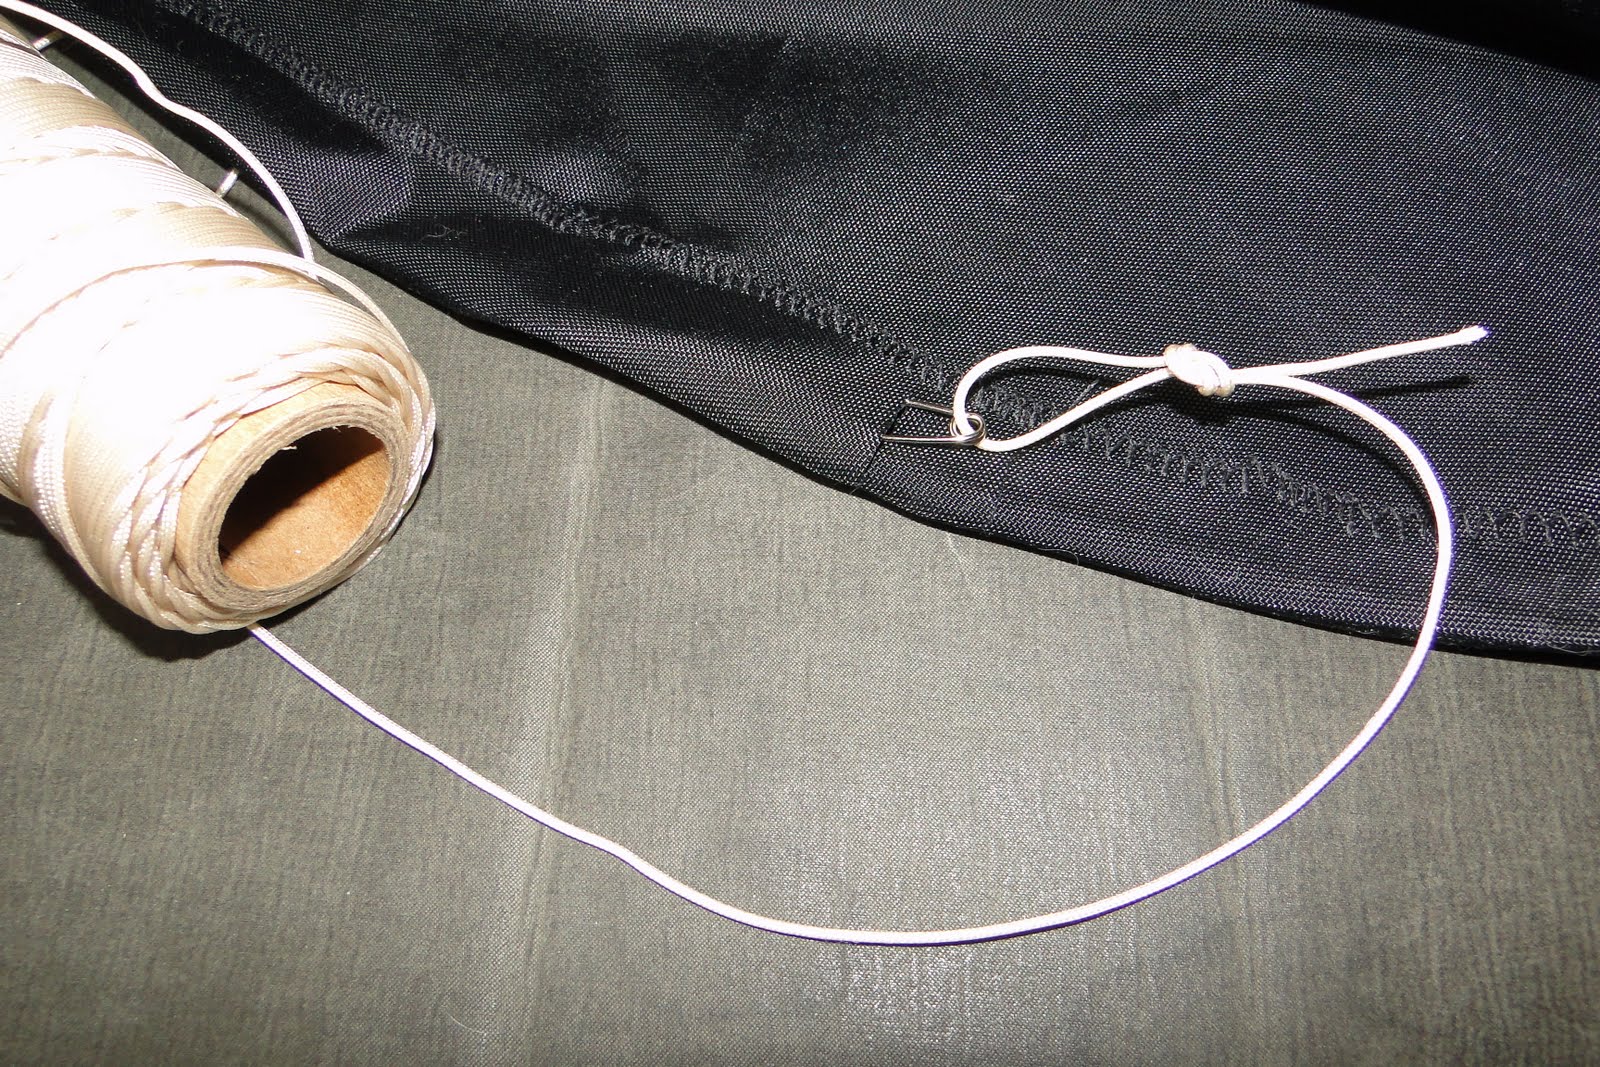
I sewed a fold around the edge and threaded the string through using a safety pin. I decided the string was too light so I tied some heavier string to the light string and pulled it through, and threaded the ends through one of those thingamabobs that hold string tight. I'm sure they have a real name but I can't think of it right now. I found them with the buttons at W mart.


There cat problem solved. Did I mention we have a cat problem?

Organizing Fabric: the Mini Bolt

I admit it. I am a fabric hoarder.

I used to see fun fabric and buy it, thinking "that would make a nice dress", or "I'll think of something to use this for, it's such a great price!". (Darn you Wally Mart $1.00 fabrics!!) I kept my stash in plastic bins, and when I needed fabric for a project...I'd go out and buy it because it was too hard to get to the right bin without emptying the entire closet.
I came across a way to organize my fabric so I can see what I have, and I can pull it out without having to move a lot of other fabric. Mini bolts are so easy that I almost feel a little stupid for not thinking of it myself. I don't know who to give credit to for this idea, but I'd like to bake you a pie!

You'll need: 1/2 yard or more of fabric (any smaller pieces, like leftovers and fat quarters are too small). I guess you could use smaller cards and make mini-mini bolts if you wanted. For now, all my scraps are in a bin, waiting for me to make a quilt. Of course I'll get around to it! I hope.

You'll also need some stiff paper, such as cardboard, chipboard or very thick cardstock. Cut the paper to about 6"x11". This works well for fabric 45" or 60" wide. I tried the heaviest weight of cardstock I could find between nearby megamarts, craft stores, and office supply places. This (110 lb) cardstock only worked for very lightweight fabric-cotton print was too heavy. My sister found some paper about twice the weight of cardstock at a specialty paper store that worked well. After I'd finished rolling my fabric I realized the cardboard from a cereal box would be perfect. Just have your friends save their boxes for you for a while...
If you don't want to bother cutting down paper, you can purchase mini bolt cards.

Fold your fabric selvage to selvage (that's the uncut length of your fabric).
For 45" wide fabric, fold it in half again, as shown in the picture. If you have a piece 60" wide, fold it selvage to selvage, then fold that in thirds.

All you do is roll it around the card.


You can store them on shelves, but I found some boxes that were the perfect size to put the bolts into. Now I need to get sewing and reduce the number of boxes. The idea is that I won't need to buy fabric for a while unless I need something very specific. I can also quickly thin the stash of odd fabric that if I am honest with myself, I know I'll never use.

It also feels really good to be so organized and not feel like I'll be buried if I open the closet door a little too far.

Warm Fuzzy


For my sister's birthday, I wanted to make her a corn heating bag. I had some green fleece, and as I cut it out I decided to embellish a little.

These are simple to make, just pick up some feed corn (DON'T use popcorn!) from your local farmer's store, or rice will work as well. Fill a cotton bag with the seed, leaving enough room that it can wrap partly around feet, your neck, etc. Sew the bag shut, and create a case out of fleece, flannel, or something else snugly.

To heat the seed, place the cotton bag in your microwave for a few minutes (don't overcook) and insert it in the case. It will stay warm for at least a half hour, sometimes longer, and is a nice alternative to a plug-in heating pad. A sachet of herbs, like lavender can be included in with the seed, or you can sew a pocket on the outside of the cotton case for a little aroma-therapy.

Fused Plastic Bag Bibs


My little buddy just decided that he was done with all this spoon-feeding, but his hand-feeding skills generate a lot of interesting kibble on the seat of his chair and on the floor. Maybe it's time to get a dog, but in the meantime I thought a bib with a pocket would cut down the crumb zone a little. I looked at pocket bibs a few times at the local box stores, but I have a hard time paying over $5 for something I can make myself. (Even if I know I'll never get around to it). When I saw a tutorial on how to fuse plastic bags together to make a thicker, sew-able plastic, I thought it would be fun to try this and make a few bibs.

The tutorial I followed left out a few important pointers. I've since found a better tutorial that shows this process in detail here.

I took eight plastic bags and cut the handles and the seam off the bottom. I cut one side to lay them flat and layered them with the printed sides on top of each other. I used parchment paper under the bags, and had one piece I moved around with the iron.

After a few seconds I realized the iron must be too hot, because this is what happened:


I turned the iron down from the cotton setting and tried again. When I finished it was a bit bubbly in places where it didn't fuse completely, but at least it didn't immediately begin melting holes. Each iron will be a bit different, but I'd suggest you start with the iron set in the middle and turn it up or down as you need.
My finished plastic fused together for the most part but there were bubbles where a layer or two didn't fuse. The tutorial I followed didn't mention turning the plastic over partway through, or re-ironing it until all bubbles fuse. I guess I don't mind the bubbling so much on a bib, it made it a little softer, but if you want to sew something like a tote you would need it completely fused so it won't rip.
I also learned the hard way that any printing on the bag would stick to the paper, so printing needs to be on the inside. It wasn't a huge problem but it made it a little messy.

I then used a bib I had to trace a pattern. This bib didn't have a pocket so at the bottom I flipped the bib and turned it out a little so the pocket would stay open all the time.


The fused bags cut easily, and though my little buddy will be advertising for a major box store, he'll just be making a mess all over it.


To finish the bib, I dug in my stash and found some bias tape. I didn't have any double-fold tape, which would have worked better, but I figured it would be silly if I went out and bought supplies to make this when I wouldn't pay for a finished product. (The age-old crafting trap!) I also had some sewable Velcro in my stash. I sewed the tape across the pocket first, then used one long piece to go from one bottom corner of the bib to the other. I sewed on the Velcro, and was finished. The bib was far from perfect but I had to keep reminding my perfectionist self: "Self, this is a BIB!".


Only 45 minutes had passed from start to finish, so I used the other half of the fused bags to make a second bib. Wow, I got two bibs done in one naptime AND I helped save sea turtles!

An alternate, also eco-friendly material to use would be to cut up an old plastic tablecloth, like the one you happened to set that hot pot down on one spot...

Here is a pattern for this bib. I think I might make it a little longer next time, this can be done easily by adding an inch or two where the pieces join. The images should be printed at 8 1/2 x 11 for it to be the correct scale. Remember printing from your browser will resize the image, so save it then print it.

Gifts for Baby Boy


I get a new nephew soon, and yes, the gifts are for him, but they mostly make the new mommy's life easier! I sewed a matching cover for a nursing pillow, nursing cover, burp cloths and pee-pee tee-pees.

(Tutorial for the tee-pee's here).


The pony on the nursing pillow turned out a little shaggy but I loved how soft the fabric is. When my little buddy was born I made a cover that was half denim and half fleece and I love it! The pattern for the pillow cover that came with the pillow form had a zipper opening at the top. After making two using this pattern, I decided I liked the version that has a velcro opening at the center instead, because it is MUCH easier to get the pillow back in. If I use the zipper again, I'll use a much longer zipper than the pattern calls for.


Another thing I added on was a handle at the top. One of mine is getting a little frayed at the top because I grab it there all the time to move it around.


The nursing cover is made from 1 1/2 yards of shirt-weight denim cut to 30" wide. That makes an extra big nursing cover. I like them big so you can nurse in public without worrying much about wind, or little hands lifting up the cover. It has a boning center so you can see the baby, and an adjustable neck loop. A washcloth is sewn into the corner so the extra half of the washcloth can be tucked in or pulled out in a hurry.

The burp rags are just two pieces of flannel serged together, because you can't have too many of these.