Labels

A few random facts about losing weight I learned in kindergarten...or physiology...or somewhere.

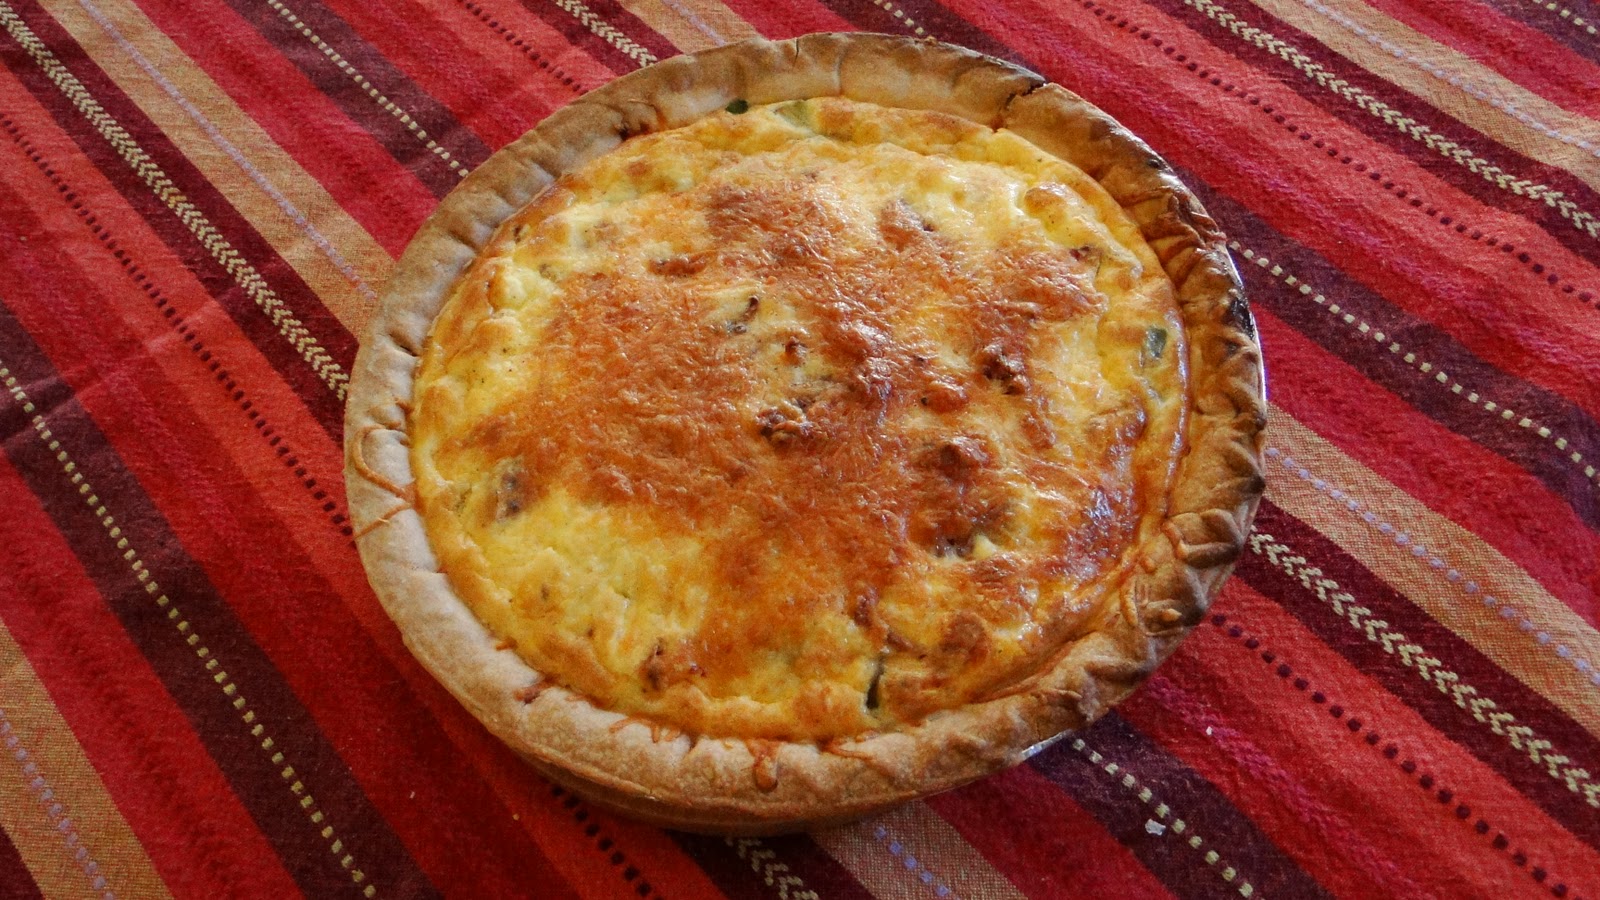
All this talk of food made me hungry.  Here is a picture of an asparagus quiche I made.
I wrote this post for another blog my sisters and I have to help each other stay healthy.  I thought I'd share it here.   I am a bit leery of promises that I can lose 50 pounds in a month like Rachel Ray just by following one little trick, or shed the pounds by only eating one miracle food, or by dropping a food group entirely.  I feel if there was a quick and easy cure for obesity, we'd already know about it.  Basically I figure if it sounds too good to be true, it probably is.  I'd much rather look into the science behind weight loss and how the human body processes calories, and tried to sum up some of the random facts about weight loss that I've found helpful over time, presented in no particular order.
Hope you find it useful :)   

*I am not a doctor, dietician, or a nutritionist, just a biologist who likes to know what's going on with her body when she's trying to lose weight.  I am not promising you'll loose 50 pounds in a month, or anything else.  Some of these facts may be replaced in the future as science learns more about how our bodies work. Haha, I love small print!

1.  Your body has a set point.  This means your body will try very hard to maintain the same weight-and it is a lot easier to raise your set point than to lower it. You'll need to get started losing weight by being diligent with exercise and careful of how you eat.   Lowering your set point is more successful when you lose weight slowly, and maintain it for a few months before trying to lose more.  People tend to lose about 10% and plateau, and while this may not be the end goal you are looking for, let your body adjust to your new portion sizes of food and rate of exercise.  After a pause, kick things up a notch and go for your next 10%.  Slow weight loss is much more likely to stay off for good.     (Here is a good article explaining what a set point is and how it affects weight loss. )

2.  Sleep matters.  If you aren't getting enough sleep, you probably won't lose weight as fast.  They haven't pinpointed exactly why, but one reason might be that you are up longer and get hungry again a while after you'd had dinner, and eat when you might be sleeping.  You also don't have the control you might if you are rested, and lack of sleep messes with your metabolism either way.

3.  Don't deprive yourself-just be strict with portion control.  Complete deprivation of a favorite food will lead to binges, then guilt, then you might get depressed and throw in the towel.  Eat a shake if you want, just don't do it every day, or finish it if you start to feel full.

4.  You don't belong to the clean plate club anymore.  It is ok to leave food on the plate.  Learn to pay attention to when your body says you are done, not when the plate does.

5.  Eating out...it can be HARD to stay on track when eating out.  Remember these places are there to sell food, and most don't care how healthy the food is, as long it tastes good so you buy a lot and come back for more.
Here are a few tricks:
Go for the salad if you like-but skip the dressing and toppings like cheese and croutons.  Some of those salads have more calories than getting a hamburger meal.  Ask for the dressing on the side and just dip your fork or each bite.  You'll eat less of the dressing but still get the taste.
Grilled chicken (hold the mayo) is also a good option, and don't feel too bad about a plain old hamburger now and then-sometimes it can be one of the lower calorie options.
Sometimes you can ask for half portions for half the price even if it isn't on the menu.
Don't be afraid to ask for other favors-like sauces on the side and requesting the meat be grilled not fried.
If you know they are going to give you a large serving, ask for a container when you start, and put half in before you even start eating.
If you are eating with other people, eat slowly, so you don't feel like you need to take more to be social while others are still eating.  Remember to keep sipping your water, and move the glass directly in front of you when done to give your hands something to do while you are waiting.

6. Drink enough water.  Sometimes it is easy to confuse thirst with hunger.  If you think you feel hungry, try a glass of water first and wait a bit to see if  you really want to eat. Drink a glass just before eating a meal. There is a reason resturants serve lots of water with their meals...

7. Eat colorful food (no, not a bowl of Trix).  Naturally colorful foods usually have more nutrition per calorie, and are visually satisfying than a plate of beige food.  Try for a variety of colors with each meal-and include white.  White fleshed fruits like apples and pears may help reduce the risk of strokes.

8. Go whole grain.  Brown rice, whole wheat bread, oatmeal, etc. have more fiber and nutrition per calorie.

9.  Fiber is good.  Besides filling you up and keeping your digestive tract moving, it binds with fat in the digestive tract so less is absorbed.  Make every calorie coming in work for you by bringing with it fiber or vitamins, etc.  Avoid highly processed food-white flour and refined sugars are the worst culprits when it comes to delivering empty calories.

10.  Snacks are good-if you pick them wisely.  Eat meals at a regular time, and plan for a few healthy snacks in-between.  If you let yourself get too hungry, you'll overeat at the next meal.  When you feel deprived and hungry all the time while dieting, you'll be less likely to stick to it.  Combining a carb and a protein will keep you satisfied longer than just a carb. 

11.  Don't give up. If you slip and eat something you shouldn't, this doesn't give you permission to give up on the rest of the day or week.  Let it go, and keep on track.  If you stub your toe, you don't keep kicking the rock...

12.  Be aware of the law of diminishing rewards.  The first bite tastes the best, but the more you eat, the more your brain starts to tune out the flavor.  (The same thing happens with smells-you'll notice a scent when you first walk in a room, but once you've noticed it, you tune it out.  It happens with touch as well.  You probably won't notice it until I mention it, but can you feel where your shirt is touching you?) You may want second helpings, but you won't have the same satisfaction when you eat it.

13. Spice it up.  Flavorful food is a lot more satisfying than bland food, and you'll pay more attention to it, helping you notice when you start to feel full.  Texture, color, variety and temperature are important too-warm foods are more filling, and crunchiness and taste add variety to the food.  If food isn't appealing, you tend to eat more of it in search of satisfaction. Have fun preparing your food, and enjoy eating it!  

14.  Are you done? Your body takes a bit of time-sometimes 30 minutes-to get the signal to your brain that you are full.  Stop when you first notice this feeling-you probably have already eaten a bit more than you needed in order to feel satisfied for a while.  Resist munching a bit more, but if you must, then switch to something with few calories.  Eating slowly also prevents overeating for this same reason, you don't eat as much in the time between when you are full and when the signal hits your brain.  This is why you sometimes are enjoying a meal and all of a sudden realize you ate WAY too much.  Blah.

15.  Have strict rules about where you eat.  Make each meal a ceremony-set the table, sit down, and don't do anything else while eating-focus on the food.  Most empty calories are eaten while reading or watching TV.  If you must munch while reading, keep something like a bag of precut veggies ready, and have a specific place you eat and read.  Avoid eating while on the couch, so it doesn't trigger hunger cues whenever you sit down.

16. Write it down.  It is easy to eat more than you think you are if you aren't keeping track.  Besides keeping track of what goes in, try keeping track for a few days of the times you get hungry-and what you are doing when you first feel hungry, and how you feel when you notice you have a craving.  You might be surprised to find you expect a snack every time you sit down to the computer-or you get cravings when you finish something and are a little bored.  Recognizing triggers will help you control cravings.  If you consistently get hungry at the same time of day no matter what you are doing, try planning a snack for that time. 

17.  Eat Breakfast!!  Some carbs with a protein get your metabolism going...which is a good thing.  Your body shuts down a bit to conserve energy while you sleep.  Once you eat in the morning, it gets things going, and you burn more calories while just sitting there.  Eat a bit just before exercising if you plan on going first thing in the morning to help you make the most of the workout-even a handful of almonds or something helps.

18.  Food Food Everywhere! Our bodies are not equipped to deal with a surplus of food.  Throughout history, a lack of food has typically been the problem.  We are designed to crave fats and sugars, and then hang on to every calorie coming in.  You aren't weak, you are just designed this way.  This doesn't mean you have no control, it just helps to recognize why it is so hard to walk away from food.  Sometimes it helps to have an internal dialogue that goes like this: "Yes, I see you, you lovely bowl of (insert favorite treat here), and my body thinks it needs you.  It is my brain that controls my arms though, and I'm going to tell them to go get that apple and a glass of water first.  When I'm done with the apple, I'll think about coming back when I'm a little more objective."

19.  Leave emotion out of it.  Don't ever reward yourself with food, or comfort yourself with food, and be very careful about how you entertain yourself with food.  Come up with other things that you find rewarding, comforting, or entertaining, and don't eat because you are sad, happy, or bored.  Eat because you need to fuel your body.

20.  Be careful of diet food.  Artificially sweetened foods may not be your friend for the following reasons:
Many people end up overeating the diet food and take in more calories than they would eating regular food. 
Your body knows the difference.  A recent study showed that your body has a natural drive to satisfy sweet cravings-and if deprived by abstinence or substitution, it will trigger binging behavior. Diet drinks were associated with weight gain because sugars trigger full feelings and also trigger pleasure hormones after eating while artificial sweeteners don't-so more food is eaten in an effort to trigger those physical responses.
Eating artificial sweeteners also increases sugar dependence.  A diet high in sweet flavors increases sweet cravings.
Sweet tastes increases your appetite-you eat more if you eat something sweet just before a meal. 
Low fat foods may be a good choice-but check the calories.  Many low fat foods are not healthy because the food manufacturer attempts to compensate for the taste by increasing the sugar or adding sweeteners.  Read the label before eating it.  Low fat food that doesn't compensate is usually ok.

21. Set yourself up for success.  First, get rid of any junk in your house that will tempt you to eat poorly.  Second, plan your meals.  Besides saving you money by preventing impulse buys, you have a plan.  Figure in leftovers and plan for nights you just don't feel up to cooking by stocking the freezer with some quick, healthy options.  Plan for snacks-if you chop up the celery, wash the grapes and peel the carrots ahead of time, they'll be ready when you get a snack attack.  And EAT before you go shopping :)  I had the WORST craving for pie the other day while in the grocery store...the only thing that saved me was that the dang things cost $7 and I wasn't about to pay that for something I could make myself...

22. Happy Holidays! If you have a party or a holiday coming up, don't let it derail you.  If you know candy will be around the house or at work, allow yourself a piece, but don't go back. (It can help for you to not throw away wrappers.  Leave the pile to remind yourself of how much you've actually eaten!)  The same with holiday treats-take small portions, and plan before you go how much dessert you will eat and stick to it.  Let's face it, holiday food is good, fun to make, and the holidays wouldn't be the same without it. Go ahead and have some!  Just remember a small piece of the pie tastes the same as the whole thing.

23.  Sorry, there are no miracle foods, pills, or tricks to weight loss (that work long term).  It takes a good old combination of eating fewer calories than you use up during the day.  It's simple physics.   Energy in, energy out.  Remember the word of wisdom, and practice moderation in all things. 


So, now we know all this, the trick is to turn knowledge into action.  Remember that if you want different results you need to do something different.  Diets don't work.  You have to commit to this way of living.


Asparagus Quiche

This recipe was submitted to Allrecipes.com by Michele O'Sullivan.

Ingredients:
1 pound fresh asparagus, trimmed and cut into 1/2 inch pieces.
10 slices of bacon
2 eight inch unbaked pie shells
4 eggs
1 1/2 cups half-and-half cream
1/2 teaspoon ground nutmeg
salt and pepper to taste
2 cups shredded Swiss cheese.
1 egg white, lightly beaten (I skipped this and just used some of the egg mixture).


Directions:
Preheat oven to 400 degrees.
Steam asparagus until tender but not overcooked.
While asparagus is cooking, cook the bacon until crispy. Drain and set bacon aside.
Beat together eggs, cream, nutmeg, salt and pepper.  
Brush pie shells with egg white (or egg mixture).   Sprinkle crumbled bacon and chopped asparagus into pie shells, top with shredded Swiss cheese into both pie shells.
Pour egg mixture over bacon, asparagus and cheese, dividing it equally between shells.
Bake uncovered for about 35-40 minutes or until firm.   Let cool to room temperature before serving.   (We ate it hot and it was pretty good that way too.)


Number Of Servings:12

Preparation Time:prep time 25 minutes, baking time 35 minutes

If you have any other tips please share!!

Operation Organize: The Epiphany

I've just had an epiphany. Or a paradigm shift. Or both?

I'M NOT ORGANIZED! I'm walking a pretty thin line between order and chaos.
Don't laugh. I assumed that having a fairly clean house meant I was organized. I thought filing all my papers meant I was organized. I thought managing to feed the baby at regular intervals meant I was organized. I've even made a lot of progress tackling some of my personal clutter monsters, like my fabric hoard, and patted myself on the back for how organized I was.
What I've just realized is the constant battle to keep the house clean and looking nice was actually causing me a lot of stress. I realized that whenever I finish a major cleaning project and sit down for a moment, I hear this little nagging voice saying "cat box, weed the garden, clean the garage, mop the floor..." and it goes on and on. Of course my perfectionist expectations add a lot of unrealistic items my List of Things That Must Be Done.
I find I'm easily overwhelmed by this seemingly endless List so I plug my ears and start singing LA LA LA I CAN'T HEAR YOU! The guilt at killing another house plant because I didn't get around to watering it, or when I don't get yet another birthday card off in time nags at me as well. There's so much to do sometimes I end up not doing anything-I've certainly perfected the skills of avoidance and procrastination. All this stress and guilt builds up and when someone asks me to do something for them I slip into my martyr mode and wince resentfully every time a straw is dropped on my back. This List interferes with things that are really important to me, but aren't demanding my immediate attention-like family time or exercising. I can see how easy it would be to just ignore everything and let it pile up to the point I get to guest star on Hoarders.

You'd think I would have figured out what I was doing wrong YEARS ago! I've been reacting to life instead of being proactive. I've learned how to take care of things (usually) just before they become a crisis, instead of being organized so I'm able to take care of things long before they become a problem. I've been so busy trying to get everything on my List done that I've wasted a lot of time that I could have been using to to do things that I love.

Alright.  The first step to solving a problem is recognizing it.  Check that one off the List.

Second step.  I need to make a plan.

The perfect plan would:
1. Organize all the housework and paperwork I need to do so I know I'll get around to everything before it becomes a crisis or is too late.
2. Has a system that is regular enough that it becomes a habit to do things that need daily or weekly attention.
3. Has some built-in down time, so I don't need to feel guilty about sitting down and reading a book or doing something trivial I love.
4. Frees up time for the things in life that are more important than a floor you don't stick to-like Family, Health, Religion.

I think any system at this point would be an improvement. I'm tired of treading water trying to just keep breathing. 
I'm off to do a little internet surfing for solutions-and since this post is a bit long, I'll stop here and outline the plan in the next one.


Homework Stations


There is no quick and easy way to get kids to do homework, but these stations might eliminate some of the excuses and avoidance tactics kids sometimes use.  In addition to being portable, they are fun and easy to put together-you certainly don't have to dress them up as much as I did-but I don't have girls, so I love the excuse to make something girly once in a while.


Some things I like about this idea:
  • All supplies are in one place.  No more "I can't find a pencil!  I need glue!" and so on.  This prevents the child from having to embark on the dangerous supply safari, from which they may never return...
  • The sign on the front flips back and forth between "Working on it!" to "I'm done!".  This may be an incentive in itself for some kids.  It also allows the parent to see how it's coming without having to nag as much, shifting the responsibility for making sure it gets done more to the child.
  • There is now a specific place for homework to be deposited when it comes in the door, and a place to leave it when it's done out of the dog's reach.  If used regularly, it will become a habit to check their station for completed homework as they head out the door. 
  • I always work better when things are organized-and cuteness makes me want to use it even it if it's for a task I'm not looking forward to all that much.  I think the same applies for kids.  
  • This idea is easily customized to fit the needs of your child, any box or container from a decorated cereal box to a little basket will work.  Just fill it with supplies that are used often, and decorate it up with something the child likes.  Involve the child and they'll be even more likely to use it.
Filling the crates:
I color-coded the baskets and items in the baskets so each girl knew who the item belonged to.  In addition to a pencil case full of things like scissors, glue sticks, colored pencils, pens etc.  I added a ruler, and a blinged-up monogramed notebook.  The cover is removable so the notebook can be replaced as it is used up. If the girls had been older, I might have included a calculator and calendar. 


To make the crate liner:
I used some mini milk crates that were going for $1 during the back-to-school sales.  They were ok, but I wanted to line them to help contain items, and to spiff them up a bit.  These instructions include dimensions for the mini crate I used, but can be used to make a liner for most straight-sided containers.  If you want to line a basket that narrows at the bottom and don't know how to adjust the pattern, make a straight-sided liner based on the widest point, then insert the liner into the container with the seams towards you.  Pin the seams to fit your container, and re-sew the seams.  Do this before hemming the liner or inserting elastic.

1. Measure the opening of the container you want to line.  The mini crate I used had an opening of 8x6 3/4".  Halve both measurements, and in the corner of a piece of tissue or larger paper draw a box using these dimensions (mine was 4x3 3/8").
2.  Measure the height of the interior of the container.  The mini crate I had was 6" tall.  Extend both lines by that amount.
3.  Draw a line parallel to the height lines to form your seam allowance line.  I put my seam allowance at 1/2".

4. To allow yourself enough give in the fabric so you can wrap it over the top, lay a ruler between the corner of the box and a point about 1/2 inch short of the end of the height line.  Extend the seam allowance line along this angle for about 3", or more if you'd like the fabric to extend down further.  Remember to allow an extra 1/2 inch or inch for hemming. Repeat for the other corner.  Extend the line back to the edge of the paper to complete the pattern.

Your completed pattern should look similar to this.
5. Cutting: fold the fabric in half, then in half again.  Position the corner of the pattern over the corner of the fabric, then cut. (I bought some fat quarters to use for this project, but found they are slightly too small.  Oh well, more for the stash).
6.  Fold fabric so two adjacent cuts are together, and sew.  Repeat for each side, so your fabric forms a box.
7.  Trim extra fabric from the corner and press seam open.Check fit at this point.


7. Create a rolled hem around the top by folding the fabric over 1/2 or 1/4 inch, depending on how thick you want the hem (be sure to allow enough room to thread your elastic through).  Fold over again, press and sew.  on the corners, create a rounded corner by rolling it as shown in the photo.  Trim extra fabric at the corners if needed.  If threading elastic through the hem using a safety pin, leave one opening, if using a threader (I love these!), leave another opening halfway around.  The corners can be a bit tricky to thread elastic through, so if you keep all the folds going the same direction it helps.  Another option is to set your machine on a zig-zag the same width as the elastic, and sew the elastic to the inside edge of the fabric, pulling the elastic taut as you sew to create a gather.  The unfinished edge can be hidden by ric-rac or ribbon once it is on the container.

8. Measure elastic length by wrapping it around the exterior of the container, and cutting it about 3 inches short depending on the give of the elastic.  You should be able to take the cut piece and stretch it around the box without it being too taut, but having enough give to overlap the ends about an inch.
9.  Thread elastic through the hem and sew ends together.  Finish hem by stitching the opening.
10. Place liner into container and adjust the gather so it is even.


The finished boxes are ready to decorate!

Homemade: Review of Homemade Dishwasher Powder

Last week I posted a review of homemade laundry detergent, to see if it was cost effective and able to clean clothes as well as commercial products.   I thought I'd try homemade dishwasher detergent since the basic ingredients were the same.
Rather than post a long list of similar recipes, I thought posted a basic recipe and list optional ingredients separately.  The recipes I found all included Borax and washing soda, usually in a 1:1 ratio.


Basic Recipe
  • 1 cup Borax
  • 1 cup Arm and Hammer Washing Soda.

Optional ingredients:
  • 1/3 cup Epsom Salts 
This ingredient serves as a water softener, one recipe called for Kosher or pickling salt which is similar to table salt, but lacks the iodine, and usually has coarser crystals.
  • 1 package powdered lemonade 
This is added because it is a cheap source of citric acid, which will help with hard water residue.  These should be the packets where sugar has not been added yet.
  • Dish Soap: NOT recommended.
Some recipes suggest adding a few drops of liquid hand-washing dish soap, however most dishwasher manufactures STRONGLY recommend against using any soap that suds.   
  • Essential Oil
A few drops for the smell, though if you are adding the lemonade, it shouldn't need any.

Rinse Aids:
  • Fill dispenser with white vinegar, or pour a cup in the bottom of the dishwasher.  This helps with hard water residue.
  • Lemi-Shine: mostly citric acid, but it worked wonders removing hard water residue on my cups when vinegar just couldn't do the job.
Directions: use one tablespoon per load, two if you have hard water.

Notes:  
  • Film on Dishes: Many people complain of a film on their dishes after switching to homemade powder.  This film is caused by minerals from hard water being deposited onto the dishes and dishwasher, and is not leftover detergent.  I have VERY hard water, and had this issue while using commercial dish-washing powder.  Using a bit more detergent helped, as did adding vinegar in the bottom of the dishwasher, but I still ended up having to wash many of my glasses and plastic-ware with vinegar to get the deposit off after a while.  My sister suggested Lemi-shine, and using this to replace some of the detergent about once or twice a week has made a huge difference in how much film is on my dishes. I expect to need to use Lemi-shine.  I'm not trying to advertise a particular product, but so far I haven't seen a generic brand works for me.
  • Want a higher yield recipe? 4 lbs borax (equals about 11 cups), 2 3lb 7oz box washing soda (one 3lb 7 oz box is about 5.5 cups), 3 cups Epsom Salt, 24 (yes, the recipe I saw said 24, I'm not sure you need that much, see what works for you) packs of lemonade powder.
  • Where can I get the ingredients?  I found both borax and washing soda in the laundry aisle at my supermarket and at Walmart. 
  • Clumping?  Homemade dishwasher detergent tends to settle into clumps.  Stirring or shaking the container each time you use it is supposed to help, as does storing it in an airtight container.  I noticed clumping beginning after a few days, and I live in a very dry environment.
  • Is Borax Safe to use on dishes? According to the product's website, using borax in the dishwasher is one of the intended uses. I wouldn't eat it, but I figure it will be rinsed off enough to not cause problems.  Yes, you can kill ants with it-a little borax mixed with honey has solved a lot of kitchen ant problems for me, but the logic that borax kills ants, therefore it is a pesticide, therefore it is toxic to humans, makes some assumptions that I couldn't find scientific basis for.
To sum up: My water is so hard I figured I'd add the salt and lemonade, just to give the homemade powder a fighting chance.  I didn't figure in the cost of using Lemi-shine since I have to use it either way, though I should note that I need to use it now every wash, instead of once a week.  Surprisingly, the cost per ounce was slightly higher to make my own powder than it was to buy an expensive brand. It was somewhat effective in cleaning, it leaves a film on some dishes, especially plastics, and doesn't seem to remove food as well as the commercial powder I usually use.
Will I make it again?  No.  The reason I was interested in making homemade dishwasher detergent was to save money.  Unless I can find the ingredients for a significantly lower price than I did, I will go back to using commercial powder.


Price Comparison:
 
Homemade Dishwashing Detergent
Cost
Ounces
Cups
Tablespoons (Loads)
1 - 4 lb 12 oz box Borax
$2.98
76
11
110
2 - 3 lb 7 oz boxes Arm & Hammer Washing Soda
$6.48
110
11
110
3 Cups Epsom Salts
$2.22
33
3
30
24 - 0.23 oz packets of powdered lemonade
$4.00
5.52
0.25
2.5

Total Cost
$15.68

Cost per Ounce
$0.07

Cost per Load (double for hard water)
$0.06


4 lb box Cascade Complete 4 in 1
Total Cost
$6.97

Cost per Ounce
$0.06

Cost per Load
$0.06

Effectiveness:

I am having a problem with the film others complained of.  It seems worst on plasticware.  I tried a few loads without Lemi-shine to see how it would go, and I had to re-wash a lot of the plastic as the film built up over time.  Using Lemi-shine and adding vinegar to the rinse dispenser helped, but not well enough to satisfy me.


Update:  After several weeks of using this recipe, I am increasingly dissapointed by how ineffective it is.  The slight film builds up over multiple washes even using Lemi-Shine and vinegar unless hand washed with soap...and that to me is a dealbreaker.  I'd ignore it but the film tends to build up on my baby's dishes the most.  I've also noticed more food is left behind than when I used commercial powder, and I don't think I can blame hard water for that.  I've gradually increased the amount of powder until I put three tablespoons per load hoping that would help, I'm using vinegar as a rinse, and I'm using two or three tablespoons of Lemi-shine a load (which is a lot more than I used to use, and that stuff isn't exactly cheap).  I'd really hoped to give you a glowing report about how well it cleaned and how much cheaper it was, but now I'm wishing I hadn't made so much of the stuff.  I think my only solution is to use the homemade powder for the pre-wash, and use commercial powder for the main wash until it is gone.  Hopefully if you make it you have better results.  I'm including a few pictures of the film. 
I washed half of the green cup to show the film better.

Prickly Pear Jelly

One of my favorite things to do is to make jelly, especially jelly from wild fruit.  I thought I'd share my (fairly) painless method of making prickly pear cactus jelly-and yes, it is worth it.

Collecting the Fruit:
First you need to collect the fruit.  There are many varieties of prickly pear cactus, and as far as I know, both the fruit and pads are edible on all Western North American Opuntia species.  These are the flat, beaver-tail shaped cactus.  Not all of them produce a good fruit for eating though-I have a beautiful purple prickly pear in front of my house, but the fruit are too shriveled and dry to use.  You want to find some that are a deep purple-red in color, and are nice and plump (there are some varieties where the fruit is ripe when yellow or green, though none of these seem to grow wild in my area, so I am unfamiliar with them, or how well their fruit works for jelly).  The flesh should be firm, if the fruit dents without much pressure from you, it is probably getting too ripe to use.  The fruit is sweet and edible without cooking-but between the thorns and seeds, I prefer to juice it. 
You can collect the fruit from public lands-usually a small amount for personal use is permitted-though if you plan on selling the fruit or products (like jelly) check the regulations.  If collecting on private land, please get permission, and make sure no pesticides or herbicides have been used near the plant.  The time of year the fruit will be ready depends on the weather, the species and your location, but is usually ripe in late July through September.
This fruit comes from a cactus, which makes collecting and handling the it a bit difficult.  The big spines aren't the problem.  You can see and avoid those for the most part-it's the glochids that will make you crazy.  You know, the ones you don't know are stuck in you until you brush your hand against something.  They  don't hurt all that much, but finding them to pull them out? Good luck! (If you do get some in you, try pressing some duct tape down over the spot, then peeling it up.  This will pull up any loose ones, though if you have some that are in deeper, you'll need tweezers...and a magnifying glass.)
Yes, you can use gloves-but trust me, you'll get poked anyway, and you'll end up having to toss the gloves because the glochids get stuck in the gloves, and end up getting in you whenever you use them after that.  I've found the easiest way to get the fruit is to use some kitchen tongs.  They keep your hands out of the way of both the big spines and the glochids.  I suggest you put the fruit in a plastic bucket to further contain the spines.  If it's a bucket you want to use again, you'll need to hose it out, then use something abrasive to get rid of all the spines.  A better idea is to ask your bakery if they have any buckets they are going to toss, some of their frosting and dough comes in buckets.  I've even picked up some at Dairy Queen before.  Then you can just recycle the bucket when you are done.

Processing:
It's always best to use the fruit as soon as possible, though you can probably store it in a cool place for a few days.  Again you need to deal with the glochids-getting some of these in your mouth or throat would not be fun.  Some traditional methods of getting rid of the spines are to roll the fruit in sand, or singe the spines with flame.  I've tried burning off the spines using a candle, but it was time consuming, and it turns out that if you are making jelly, you don't need to remove the spines. After rinsing the fruit with a strong spray of water, I use tongs and a knife to cut each fruit in half.  I put several layers of cheesecloth in the food basket and place the fruit inside.  It helps to clothespin the cheesecloth in place until all the fruit is in the basket.  I've found that you can steam the fruit whole, but it helps to cut the fruit at least once, though you don't need to cut it up much.  I also put a few layers of cheesecloth around the end of the hose to catch any spare glochids that may come through.  The less you disturb the fruit once it is in the basket, the fewer glochids will be released. Follow the instructions from the steamer manual from here.  You'll know you are done when the fruit stops releasing juice.  You can press the fruit at this point if you want, but I don't usually get enough juice to make it worth it.  With most fruits, the jelly looks much clearer and prettier if you don't press the fruit, and I don't want to press any glochids through the cheesecloth with the cactus fruits.
(A few tricks: put a bottle in a drawer next to the stove to catch drips, and so you don't have to handle a hot jar of juice.  Another trick is to put a few marbles in the water pan-they will start to rattle when the water level gets too low, so you can avoid boiling the pan dry-which is bad...Very bad.)

If you don't have a juicer, place the fruits whole into a pot, bring to a boil, and boil for ten minutes.  Mash with a potato masher, then boil for another ten minutes.  Pour juice out through cheesecloth to strain. 


Making Jelly:
Once you have the juice you can make jelly immediately, or you can freeze the juice to make it later.  Find a recipe from a reliable source such as a university extension office or official canning website like Ball or Kerr.  Jelly is a little safer to experiment with than other canning foods, but you don't want to risk wasting your work on something that is potentially dangerous to eat.  Recipes from these sources have been tested for safety.
It always helps if the little ones don't get tired of you cooking and try to push you out of the kitchen.


 This recipe is from Preserving Food in Wyoming: Wild Berries and Other Wild Fruit by the University of Wyoming Cooperative Extension Service, College of Agriculture and Natural Resources, p. 23.  You can find the entire publication here.


Prickly Pear Jelly
3 cups of cactus juice (made from approximately 12 cups ripe cactus fruit)
½ cup lemon juice
1 package of powdered pectin
4½ cups of sugar
Jelly bag or three layers of cheesecloth
 
Mix cactus juice and lemon juice with powdered pectin. Place over high heat and stir until the mixture comes to a rolling boil. Add sugar, bring to a vigorous boil again, and boil for 1½ minutes stirring constantly. Remove from heat, skim off any foam, and pour quickly into hot half-pint or pint jars or hot sterilized half-pint or pint jars leaving ¼-inch headspace. Wipe sealing edge of jars with a clean, damp paper towel. Adjust lids and process in a boiling-water canner, for 10 minutes, adjusting processing time for altitude.  For good instructions on using the water bath canning method, and a chart for adjusting processing times, go here.

If you'd like to make syrup instead of jelly, just omit the pectin, and follow the directions as listed above.