Labels

Showing posts with label Thrifty Living. Show all posts

Not Beyond Repair

Yeah!  A five-dollar fix for something I thought I'd have to toss out!  A bit ago I was given an aluminum steamer juicer.  They are fantastic when you want to juice a lot of fruit without a lot of effort -see my prickly pear jelly tutorial here. There are three sections to this kind of juicer-the top section holds the fruit (or vegetable).  It has holes like a seive which allow the juices to drip down into the second section.  The lowest section holds water that rises up through the fruit to steam it and release juice. The trick to using these juicers is to never let the water in the boiler run out.  It is easy to do though, since you fill it up and leave it on the stove for hours to collect all the juice.  (I've heard that if you put a few glass marbles in the water, they'll start to make a racket when the water gets low.  Definitely going to be testing that one the next time I juice!)
This particular juicer had been boiled dry, and some pinholes had formed on the base...making the whole thing useless.  I thought I would just order a replacement part-which is usually fairly easy.  Unluckily, it appears this company went out of business quite some time ago, and the pot from another brand was slightly too small.  I stuck the thing on a shelf hoping I could come up with something...and a while later I read you could repair it with J-B weld epoxy (I'll post the link if I can find it).  There may be other brands that would work, but this is the only brand carried by the stores I tried.  J-B Universal Epoxy stick was what the original source said to use, when I couldn't find it, I bought J-B Steel Stick Epoxy had all the same characteristics, so I used that.  As far as I can tell the only difference was the color.  You just need to make sure the epoxy adheres to Aluminum, and double check to make sure it is drinking water safe (though as far as I can tell, all J-B welds are non-toxic and bond with aluminum). 
The putty comes rolled in plastic, which is held in a plastic tube.  Slip it out of the tube and unwrap enough of the stick to cut off a section.  I found a half inch of putty was overkill for my repair-I used it all anyway, figuring I might not be able to see smaller holes that haven't quite broken through all the way.  The putty has two parts to it-there is a darker core that you need to mix together with the outer layer.  This only took a few minutes of mixing by hand.  The package says to mix until you get a uniform color.  It also suggests you do this with damp hands so it doesn't stick-very true.  I ended up moving the whole project near the sink so I could keep my hands damp-it gets pretty sticky otherwise, and prefers to stick to you over the metal unless your hands are damp.  It was a bit smelly while it was being mixed-you may want to open a window.
Once the two parts are mixed together, press it into the holes and spread it around.  It is a bit thicker than chewing gum, so it doesn't spread too easily, it might be easier to put small dots down and smooth them together by pressing them.  I got part of the pot a bit wet, and it took some pressure to get it to stick to that spot, but it did stick. You have about five minutes to play with it.  I found I had plenty of time to get it the way I wanted before it started to harden.  If you have a bigger project though, you may want to mix it in small batches to be sure you have time to apply it.  Once you have it where you'd like, you can smooth it down using your fingers, or maybe a plastic spoon.  Once it hardens you can drill or sand it if you need to.  It should become pretty inflexible after about 30 minutes, and is supposed to cure after an hour.  I'm going to give it a few days to set before I try heating it just to be sure. (The product's web site says it can withstand temperatures up to 500 °F.)
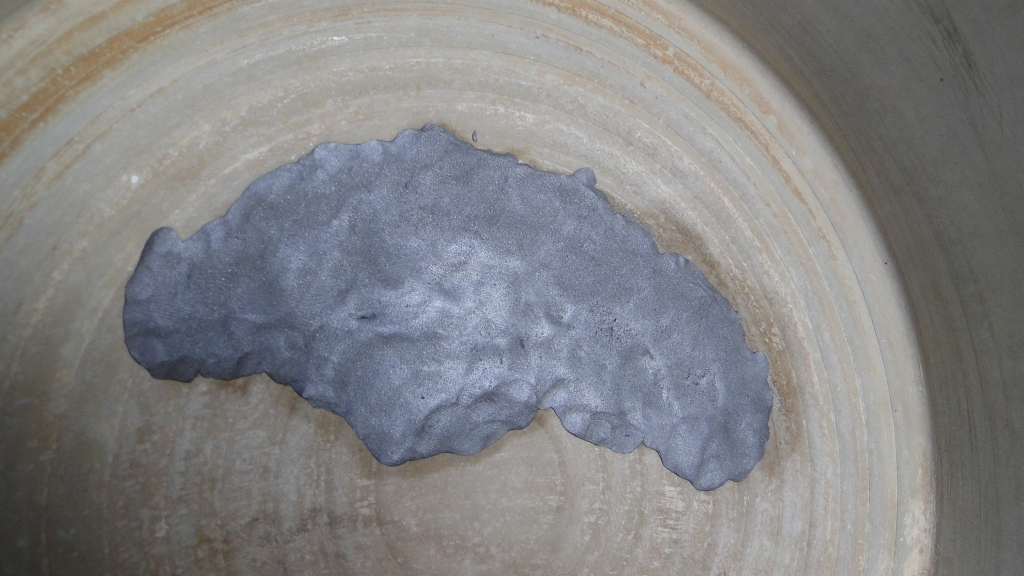
It's not a pretty patch, but I'm just happy to have a working juicer.   The alternative is recycling the juicer, so I figure I'll come out ahead if it works, not much is lost if it doesn't.  I'll post an update once I've tested it...I was just too excited to share this to wait.

If you try this, let me know how it turns out.

I even have enough left over to try and patch the leaky garbage disposal!


Is it safe?
The product's web site claims it is non-toxic, (though they suggest you don't eat it...duh).  Other information I was able to find suggests that most epoxy resins are non-toxic when hardened, though sanding or filing it can release bits that may be swallowed or inhaled.  Most health concerns seem to be with the chemicals in the pre-mixed state-most epoxies contain two chemicals that mix to form a strong, non-toxic polymer.  Wash your hands after using the putty, avoid inhaling it too deeply while mixing, and you'll probably be fine.  If you are concerned about metals and chemicals, you may want to skip an aluminum juicer altogether and go with an enameled one.  (In the 1960's and 70's there was some suspicion that aluminum could be linked to Alzheimer's, but no study since has been able to link the two, and everyday use of aluminum is considered safe.  See the Alzheimer's Association page).  Enameled juicers are nice but more expensive.  I figured I'm not going to be using it for food I'll eat in large enough amounts or frequently enough to bother me.  My drinking water probably has more stuff in it based on what is left behind when it evaporates.


Here is the company's website if you have other questions.

Update: I used some more of this stuff to patch two cracks in our garbage disposal that would spray every time we turned it on, and dripped when the dishwasher was run.  When I looked up repair options most websites said I'd need a new one, which is not an option for us at the moment.  I cleaned the cracks and let the disposal dry for a day without using the sink, then patched up the cracks.   I now have a disposal that doesn't leak a bit!  Yeah!  I'm hoping it will last us for a while-but we'd be happy with any time it buys us before we have to replace it.  I still have over half a stick...what to fix next?

Update again: I just used this juicer to process ten quarts of cactus juice and the patch worked perfectly.  I also tried the trick of putting a few marbles in the bottom, the idea was that they would start to jitter when the water level got low and I'd hear it.  That myth was busted for me-I don't know if the rings on the bottom of the pan kept the marbles from bouncing but they didn't make any noise.  Luckily I checked the water level hourly, and avoided disaster. 

Oh, and the garbage disposal?  It's been six months without a drip! 

Homemade: Review of Homemade Dishwasher Powder

Last week I posted a review of homemade laundry detergent, to see if it was cost effective and able to clean clothes as well as commercial products.   I thought I'd try homemade dishwasher detergent since the basic ingredients were the same.
Rather than post a long list of similar recipes, I thought posted a basic recipe and list optional ingredients separately.  The recipes I found all included Borax and washing soda, usually in a 1:1 ratio.


Basic Recipe
  • 1 cup Borax
  • 1 cup Arm and Hammer Washing Soda.

Optional ingredients:
  • 1/3 cup Epsom Salts 
This ingredient serves as a water softener, one recipe called for Kosher or pickling salt which is similar to table salt, but lacks the iodine, and usually has coarser crystals.
  • 1 package powdered lemonade 
This is added because it is a cheap source of citric acid, which will help with hard water residue.  These should be the packets where sugar has not been added yet.
  • Dish Soap: NOT recommended.
Some recipes suggest adding a few drops of liquid hand-washing dish soap, however most dishwasher manufactures STRONGLY recommend against using any soap that suds.   
  • Essential Oil
A few drops for the smell, though if you are adding the lemonade, it shouldn't need any.

Rinse Aids:
  • Fill dispenser with white vinegar, or pour a cup in the bottom of the dishwasher.  This helps with hard water residue.
  • Lemi-Shine: mostly citric acid, but it worked wonders removing hard water residue on my cups when vinegar just couldn't do the job.
Directions: use one tablespoon per load, two if you have hard water.

Notes:  
  • Film on Dishes: Many people complain of a film on their dishes after switching to homemade powder.  This film is caused by minerals from hard water being deposited onto the dishes and dishwasher, and is not leftover detergent.  I have VERY hard water, and had this issue while using commercial dish-washing powder.  Using a bit more detergent helped, as did adding vinegar in the bottom of the dishwasher, but I still ended up having to wash many of my glasses and plastic-ware with vinegar to get the deposit off after a while.  My sister suggested Lemi-shine, and using this to replace some of the detergent about once or twice a week has made a huge difference in how much film is on my dishes. I expect to need to use Lemi-shine.  I'm not trying to advertise a particular product, but so far I haven't seen a generic brand works for me.
  • Want a higher yield recipe? 4 lbs borax (equals about 11 cups), 2 3lb 7oz box washing soda (one 3lb 7 oz box is about 5.5 cups), 3 cups Epsom Salt, 24 (yes, the recipe I saw said 24, I'm not sure you need that much, see what works for you) packs of lemonade powder.
  • Where can I get the ingredients?  I found both borax and washing soda in the laundry aisle at my supermarket and at Walmart. 
  • Clumping?  Homemade dishwasher detergent tends to settle into clumps.  Stirring or shaking the container each time you use it is supposed to help, as does storing it in an airtight container.  I noticed clumping beginning after a few days, and I live in a very dry environment.
  • Is Borax Safe to use on dishes? According to the product's website, using borax in the dishwasher is one of the intended uses. I wouldn't eat it, but I figure it will be rinsed off enough to not cause problems.  Yes, you can kill ants with it-a little borax mixed with honey has solved a lot of kitchen ant problems for me, but the logic that borax kills ants, therefore it is a pesticide, therefore it is toxic to humans, makes some assumptions that I couldn't find scientific basis for.
To sum up: My water is so hard I figured I'd add the salt and lemonade, just to give the homemade powder a fighting chance.  I didn't figure in the cost of using Lemi-shine since I have to use it either way, though I should note that I need to use it now every wash, instead of once a week.  Surprisingly, the cost per ounce was slightly higher to make my own powder than it was to buy an expensive brand. It was somewhat effective in cleaning, it leaves a film on some dishes, especially plastics, and doesn't seem to remove food as well as the commercial powder I usually use.
Will I make it again?  No.  The reason I was interested in making homemade dishwasher detergent was to save money.  Unless I can find the ingredients for a significantly lower price than I did, I will go back to using commercial powder.


Price Comparison:
 
Homemade Dishwashing Detergent
Cost
Ounces
Cups
Tablespoons (Loads)
1 - 4 lb 12 oz box Borax
$2.98
76
11
110
2 - 3 lb 7 oz boxes Arm & Hammer Washing Soda
$6.48
110
11
110
3 Cups Epsom Salts
$2.22
33
3
30
24 - 0.23 oz packets of powdered lemonade
$4.00
5.52
0.25
2.5

Total Cost
$15.68

Cost per Ounce
$0.07

Cost per Load (double for hard water)
$0.06


4 lb box Cascade Complete 4 in 1
Total Cost
$6.97

Cost per Ounce
$0.06

Cost per Load
$0.06

Effectiveness:

I am having a problem with the film others complained of.  It seems worst on plasticware.  I tried a few loads without Lemi-shine to see how it would go, and I had to re-wash a lot of the plastic as the film built up over time.  Using Lemi-shine and adding vinegar to the rinse dispenser helped, but not well enough to satisfy me.


Update:  After several weeks of using this recipe, I am increasingly dissapointed by how ineffective it is.  The slight film builds up over multiple washes even using Lemi-Shine and vinegar unless hand washed with soap...and that to me is a dealbreaker.  I'd ignore it but the film tends to build up on my baby's dishes the most.  I've also noticed more food is left behind than when I used commercial powder, and I don't think I can blame hard water for that.  I've gradually increased the amount of powder until I put three tablespoons per load hoping that would help, I'm using vinegar as a rinse, and I'm using two or three tablespoons of Lemi-shine a load (which is a lot more than I used to use, and that stuff isn't exactly cheap).  I'd really hoped to give you a glowing report about how well it cleaned and how much cheaper it was, but now I'm wishing I hadn't made so much of the stuff.  I think my only solution is to use the homemade powder for the pre-wash, and use commercial powder for the main wash until it is gone.  Hopefully if you make it you have better results.  I'm including a few pictures of the film. 
I washed half of the green cup to show the film better.

Homemade: A Review of Homemade Laundry Soap


In an effort to be more frugal, I've decided to test the affordability and effectiveness of some homemade products. Powdered homemade laundry detergent seems to be highly praised, so I thought I'd start with that.

Most homemade laundry detergent recipes are similar, so I researched the ingredients to find out why they were added to the recipe. It turns out there are three ingredients that are nearly always included, and several ingredients that are optional. Instead of posting all the recipes I found, I posted a general recipe you can adapt if you decide to make your own.

Recipe for Homemade Laundry Detergent:
Necessary ingredients:
  • 1 cup Borax (Cleans, disinfects, and softens water).
  • 1 cup Arm & Hammer Washing Soda (This is sodium bicarbonate, and alkali salt that breaks down grease and dissolves stains. It softens water by binding with chemicals that cause hard water, allowing the detergent to form more suds and work more effectively).
  • 1 bar of Fels-naptha soap, Pink Zote Soap, Kirk’s Castile unscented soap, or Ivory Soap, just don't use something heavily perfumed. (Cleans).

Optional Ingredients:
  • 1 cup Oxyclean or store brand oxyclean
This is a mixture of washing soda and powdered hydrogen peroxide. The baby version only has these two ingredients, the regular mix has some detergent added. Some people complained of whites gradually getting dingy with homemade detergent. This will counteract that. Some people opted to just add a scoop to whites and loads that were especially grubby to save money.
  • 1 cup box Arm & Hammer Baking Soda
Some recipes include this as a whitener and to make it smell nicer, it also softens water.
  • White Vinegar
Some people claimed using this as a rinse helped remove buildup of hard water residue and killed a musty odor others complained of. Some didn't like the strong smell of vinegar and suggested an extra rinse cycle to get rid of the vinegar smell, though other sites claimed the vinegar smell disappeared after drying. My machine isn't programmable and I'd have to babysit the machine to be able to add the vinegar, if I end up having to do this, it will probably be a deal-breaker for me. Stiff towels are a good indicator that you have too much detergent residue left after the wash.
  • Calgon Powder
This was also suggested as a solution to the buildup of hard-water residue, the suggested amount was around1/2 cup but amount may need to be increased based on how hard your water is.
  • 1/4 cup Cascade dishwashing detergent per load
This detergent contains an enzyme that helps break down protein stains.
      • A few drops of essential oils
      This makes it smell pretty-the favorites are usually citrus or lavender.

      Directions:
      Grate or shred soap with cheese grater or food processor. Mix all ingredients together, and use one-two tablespoons per load using the directions on your machine. This soap can be a little slower dissolving in water than store-bought soap, so it works best to put the soap in the machine and start the water before adding clothes.

      Notes:
      Hot or Cold? Some sites claimed using hot water was essential when using homemade, others claimed cold worked fine, still others claimed you only need hot water for whites. Detergents begin to lose their effectiveness below sixty degrees either commercial or homemade.
      Hard Water? If you have hard water, you will need more detergent-this is true of store-bought detergent as well.
      High Efficiency Machines? I do not have a high-efficiency machine, so I am not aware what special needs these machines have. Some claim that this is not a high-sudsing recipe, so it is ok, but I don't have enough knowledge on this point to make recommendations.
      Pre-treating Stains? Some sites recommend rubbing stains with the Fels-naptha soap, others suggest using Dawn Dishsoap. I haven't tried either method. I think for now I'll stick to presoaking in water and Oxiclean. If I end up testing pre-treatment methods, I'll post the results. I have to pretreat stains for my regular detergent anyway so I don't think it is a reflection on how well this recipe works.
      Want a larger yield recipe? 4 lbs borax (equals about 11 cups), 2 3lb 7oz box washing soda (one 3lb 7 oz box is about 5.5 cups), 11 bars soap.
      Where can I get the ingredients? Most larger supermarkets have these ingredients. I found everything at our small Walmart, though the only bar soaps available there were Fels-naptha soap and Ivory.
      Shredding the soap? Some people complain of the tediousness of hand-shredding the soap, but others said it was no big deal. The soap I was shredding was a little hard to shred by hand-I could have done it but after a few minutes I decided to just do in in the processor. I tried both of the options my little food processor offers, the shaving option came out looking like grated cheddar, the cutting option made it little pea sized lumps. I was hoping for more of a powder to make it easier to mix everything together. I ended up going with the cheese curls, then chopping those down. I think Ivory would powder up better. I don't think shape matters much with effectiveness unless you have chunks too big to dissolve during the wash.

      I tried to anticipate your questions, though this is my first attempt at making the soap. I'll try to answer any other questions you may have, but this is my first attempt too. In a few months, after using up this batch, I will post an updated review. Thanks!

      To sum up:
      When I added everything up, the cost is nearly the same as cheap commercial laundry detergent, and about half that of the nicer brands. If you shop around and find the ingredients at a low price, and use a less expensive bar soap, you may be able to cut the cost of making your own even further than I did. I haven't figured out how to get the $0.01 per load that some makers of their own soap got.
      Homemade worked just as well as store bought, and worked even better when Oxyclean was added. Will I make it again? I was really hoping the cost difference would be greater. I would definitely switch if saved me more money, it was easy enough to make, especially using a food processor, and it does the job.


      Price Comparison:


      Homemade Laundry Detergent
      Cost
      Ounces
      Cups
      Tablespoons (Loads)
      1 4 lb 12 oz box Borax
      $2.98
      76
      11
      110
      2 3 lb 7 oz boxes Arm & Hammer Washing Soda
      $6.48
      110
      11
      110
      11 5.5 oz bars Fels-Naptha Soap, grated
      $10.67
      60.5
      5.5
      55


      Total Cost
      $20.13
      Total Ounces
      246.50
      Cost per Ounce
      $0.08
      Total Tablespoons (Loads)
      275
      Cost per Load
      $0.07


      Regular Tide Detergent 169 oz box, 120 loads

      Total Cost
      $20.47


      Cost per Ounce
      $0.12


      Cost Per Load
      $0.17


      Regular Sun Detergent 85 oz box, 80 loads

      Total Cost
      $4.98


      Cost per Ounce
      $0.06


      Cost per Load
      $0.06


      I added the package totals together to get the total ounces, then I figured ~10 tablespoons detergent per cup, about 27.5 cups for a large batch, so about 275 tablespoons. This is a pretty rough estimate since I didn't measure the amount of detergent precisely, I just wanted to get an idea if the cost was comparable. Ivory Soap was $4.27 for a pack of nine bars, if you used that, your cost would be a bit less.

      Effectiveness:
      Here are the images of the results (apologies for the quality):

      Now, I wasn't expecting stains like these to come clean completely, but I thought it was a quick way to compare cleaning ability. I took some white cotton cloth, and stained strips with soil, ketchup, grass, driveway oil puddle, and soy sauce. I made mini stained quilts and soaked two of them in Oxyclean water for about two hours. Then I washed one the pre-soaked, and one of the un-soaked in two seperate loads. I used hot water for both loads, and added Oxyclean to both loads because I wanted to keep it as close to the way I normally wash as possible. I but added the reccomended amount of Sun brand detergent to one load, and two tablespoons of homemade detergent to the other load. Thinking back I should have made one more and washed it in water for a control. Does your kid need a science fair project?
      I was a little surprised at the results. The winner? Presoaked + Homemade. The looser? Unsoaked Homemade. For some reason, combining Oxyclean presoaking with the homemade detergent yeilded the best results. I was also a bit surprised that the presoaking didn't make as much of a difference as I thought it would, I guess the Oxyclean I added to the wash did nearly the same job as presoaking.
      I'd like to do this test again, without the oxyclean in the wash at all, and try it with a more expensive commercial brand.

      Pretreating Stains:
      Of course I'll have to pretreat stains using homemade detergent, just as I do with store-bought soap.
      Let me explain, no, there is to much. Let me sum up:
      • Work fast if possible, fresh stains come out more easily.
      • Avoid rubbing stains with bar soaps, many stains can be set in by doing this.
      • Avoid heat: if the stain doesn't come out with the first wash, don't put it in the dryer, re-treat and re-wash.
      • Pretreat with a stain remover that contains enzymes if the stain is a protein stain like blood or grass.

      Here is a good site on removing stains.

      How to Hack your Swiffer (Because You are Thrifty, or because You are Trying to be Environmentally Responsible)

      I was given a Swiffer Jet mop. It is a lot more convenient than mopping, but I have a hard time paying for the disposable pads and solution. I usually use three pads each time I mop, and it adds up. I'm not terribly fond of their cleaning solution either, it always seems to leave a film on the floor.

      After a little research I found it is easy to make this device more economical and cut down on waste.

      You need a Swiffer Jet or similar wet mop, microfiber cloths, pliers, and a sewing machine or serger.


      When I first got the mop I tried to figure out how to refill the bottle but had given up. It turns out you just need some pliers to give you enough grip to twist the lid off. The first time I tried it the lid came right off, but the second time I refilled it the lid didn't come off as easily, but I got it off eventually. I'm not sure why. Once the lid is off, you can refill it with your favorite floor cleaner, or just use a vinegar-water solution. (If you have hardwood floors, make sure your solution is safe to use on them).

      I bought the thickest microfiber cloths I could find at the dollar store and used an original pad for a guide as to how to fold it. It doesn't matter much if it's a little bigger than the original pad.

      I folded it so the edges were inside, and I surged the sides to hold it together.
      My Swiffer has some Velcro that holds the pad on, if your mop doesn't have this, you could sew some elastic to the pad to hold it to the mop. Microfiber sticks well to the Velcro, but you could use elastic to hold a pad made out of other fabrics, like old towels to the mop.

      The homemade pads are machine washable, and you can flip them over once one side gets dirty. After testing the new pads, I decided to sew across the pad a few times to keep all the layers together. The microfiber worked so much better than the disposable pads ever did, and I only ended up using one (flipping it over once) instead of the three disposable pads I usually use.

      I'm feeling so thrifty and eco-friendly right now! Now I just need a steamer mop...