One of the biggest causes of stress for me has been the struggle to keep up with housework. I've been on a search to find a way to manage what I need to do, and I came across a great method at
Organized Home
where index cards are used to organize the seemingly endless list of things
that need to be done to keep up a home. The card file helps me rotate through chores that only need doing
occasionally. This way I don't feel guilty walking past a window that
could use some cleaning, or that dusty ceiling fan-I know I'll get to it
soon enough. After using it for a few months, I've tweaked their system a bit as I've learned what works
for me and what doesn't work so well.
Here is a quick summary of
how to set up a card system:
First step: Inventory
Walk through
your home with a notepad and write down every chore that needs to be
done, regardless if it is one you have to do daily or one that only
needs attention once a year or so. Don't
worry if you don't think of everything at once, you can add or take out cards whenever you like.
Second: Create Your File Cards
What to put on the card: For
each chore you listed on the notepad, take an index card and list the
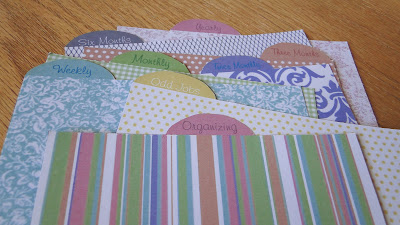
chore in the middle of the card. Decide how often that chore should be done-I divided mine into weekly, twice a month, monthly, every 3 and 6 months, and yearly, and write that on the card-I put it in the top left corner. I only have a few yearly cards, and it turned out each one of them should be done a specific time of year (like changing fire alarm batteries and getting the AC unit serviced) so I'm thinking I'll just keep those cards as a reminder to put them on my calendar.
On the back of the card I make a note of the date when I get a task done. In the photograph above I put a few more things on the sample card that some people find useful, like the location, time to complete, or a checklist of things to be done to complete the chore (which makes it easier to delegate to other family members if you have help).
*Side note: "Cleaning the Family Room" can mean different things to different people. What seems to be obvious to you sometimes needs to be written out. I took a family relations course where the instructor asked everyone to draw a picture of a house. She came up to me and said "No, you're doing it wrong!" and moved on. She came back several times and said this. I had no idea why my house was wrong. Finally she came back and pretended to be frustrated "No! All houses should have two windows, a door in the middle, and a tree!!" We avoid a lot of frustration and conflict with family members if we explain that to us a clean family room consists of the following: Pick up toys. Vacuum. Dust, and Wipe finger marks off the TV. They might feel they are done after picking up toys. If a child (or spouse) has a checklist to check off portions of the task as they go, you'll both be more likely to be pleased with the result.
Colored Cards: There were several options for using colored
cards-at first I used colors for different types of tasks-white was for
housework, blue for paperwork...but found I only had one or two colored
cards. I decided to use the card file for housework tasks only, and I
ended up using colored cards for each area of the house. This way I
pull the cards I need to do for the day, and can quickly group them by
area since I like to tackle one room at a time.
Frequent Tasks: Organized home suggests writing a card for
everything. I started out with cards for daily things like sweeping,
running the dishwasher, etc. Some people really like the satisfaction of filing away cards, but I found it was just one more thing to keep up with. I combined some tasks I always do together-like washing dishes then wiping down the counters and stove. I ended up tossing daily and weekly cards and made a card for each day of the week where I write a reminder of some things I'd like to get done that day-like watering plants and paying bills on Monday, recycling goes out on Wednesday, etc. I use Tuesdays to make sure the kitchen counters are clear and the living room is presentable. I've found I'm a lot more motivated to tackle deep cleaning tasks if I've got a fairly clean house to start with.
One-time tasks: I made one card where I listed odd jobs-things that only need doing once like mending a screen or building shelves for the garage. As I complete these, I cross them off the list and start a new card. I try to get at least one of these done a week. Most of these are fiddly little repairs that don't take much time-like that loose doorknob you only notice when you are heading out the door and don't have time to do anything about at the moment.
De-cluttering: I have several clutter magnets around the home. The worst are the top of the piano, and the chef's cart in the kitchen. Once or twice a week I clean these off so it doesn't become a big job.
Organizing: Once a week, I pick one closet, shelf, or drawer and organize it. Organized home suggests moving through your house systematically -starting in one room and each time you tackle another spot, work your way clockwise through the room, then move on to the next room, and eventually you get back to where you started. I usually pull everything out, wipe or vacuum out the area, and organize everything as I put it back. I take this time to say goodbye to things I don't use or need. I usually keep a laundry basket there and toss everything that doesn't belong there into the basket. (Putting away these items needs to be part of the chore for me or it would just sit there...) Some bigger closets, like the one with my fabric and crafts, take more than one session. I have a card where I note the location of the area organized and the date I last tackled it.
Third: Using the Cards
There are a few ways to use your chore cards. I started out with the calendar system but just switched to a much simpler system. Both are explained below.
Calendar System:
Organized Home suggests filing the cards using a calendar. An index file with month and days are used to divide the cards up evenly between the weeks, and as a chore is completed, it is filed back into the calendar according to when it should be done next. Divide these evenly through the
calendar. Take the weekly chores and place them all in the first week
on your cleaning days. The monthly chores should be divided into four
(or five) piles and each pile placed in each week of the first month,
chores to be done every three months are divided up by the number of
cleaning days in the first three months and so on. I filed most of the
chores on my heavy cleaning day, Wednesday. Chores that were to
be done on a certain date or season were filed into the month they needed doing. I used
Organized Home's
method of dividing up the days of the week so each day is set aside for
certain tasks. If you are interested in how I organize my week,
my post where I explain it is
here.
As you complete a chore, you file it
to the next date that it should be completed on. Weekly chores are put
in the next week's date, the monthy chores one month away, and so on.
If you can't complete a chore, you make a note on the card and file it
as if you'd done it. If you've skipped it twice, you should tackle that
chore before others the next time it comes up.
Pros: This is highly organized and it can be satisfying to refile each card months away as you complete the task. You can easily file cards that need to be done seasonally. Looking at the cards daily was motivation for me to keep up on things.
Cons: If you have a bad week and don't open your box...it can get complicated. You can easily skip a chore or two and refile it, but A whole week of traveling or being sick throws it all off,
and I had to unpack the files and re-divide them several times. This got old.
Rotating System
Instead of
filing the cards into specific dates, I have one divider for each group
of chores based on how often they need doing. I then figure how many chores I need to finish that week
in order to cycle through the whole pile within that time frame.
I've set aside every Wednesday for heavy cleaning, and Fridays for lighter cleaning. When using the cards, I go through as many of the chores as I can on Wednesday, and finish the pile on Friday. I've found I'm a lot more successful if I get all my weekly chores done on Tuesday-things like mopping and vacuuming, so I have a clean (ish) house to start with on Wednesdays. It is easier to do things like wash windows if I'm not looking at sticky spots on the kitchen floor.
I have sixteen monthly chores, which need to be done every four weeks. That means I needed to do four a week to rotate through all of them by the next month. I had nineteen that need to be done every three months, which means I have twelve weeks to do them all. If I do two a week, I'll cycle through them in less than three months, but I figure that will make up for an off week now and then. I figured I'd use any fifth Wednesdays to catch up on odd jobs. I ended up needing to do four monthly chores, two three-month chores, and one six month chores. Chores that
need to be done at a specific time of year will go into my planner
instead of the file.
I ended up with the following task list for each week:
-Four Monthly
-Two 3-Month
-One 6-Month
-Organize one closet, shelf or drawer
-Do one odd job
As a job is completed it is filed at the back of its section. If you don't get to it, you just leave it where you'll pull it next week.
Pros: If I have an off week, I just pick up
where I left off instead of having to refile everything. It is a simpler system but still gets the job done.
Cons: I haven't noticed any so far. I'll keep you posted :)
Fourth: Don't Get Discouraged!
Depending on how clean things were to begin with, it may take a while before your home is to where you'd like it to be. I still get frustrated that it takes hours to clean the kitchen, and only 15 minutes to make it look like I haven't touched it in a week. That's when I put on my martyr hat and start over :) At least the living room...oh. Nevermind. It helps me to focus on the positive-every window you wash, every drawer you sort through, gets you closer to your goal. At least I have a plan now, where before I'd just go hide in a book.
Again, I suggest you visit
Organized Home. I found it very useful, even if I ended up using a modified version of their system. They may have suggestions that would work better for you. In addition to the housework organization file, they have tons of other ideas, and they even have a holiday version of the card file to keep track of everything that needs to get done for the holidays!
(I am not affiliated with
Organized Home in any way, I'm just a big fan!)


 Hope you have fun with this! I'd love to see any you make-especially if you go for other superheroes!


