Labels

Prickly Pear Jelly

One of my favorite things to do is to make jelly, especially jelly from wild fruit.  I thought I'd share my (fairly) painless method of making prickly pear cactus jelly-and yes, it is worth it.

Collecting the Fruit:
First you need to collect the fruit.  There are many varieties of prickly pear cactus, and as far as I know, both the fruit and pads are edible on all Western North American Opuntia species.  These are the flat, beaver-tail shaped cactus.  Not all of them produce a good fruit for eating though-I have a beautiful purple prickly pear in front of my house, but the fruit are too shriveled and dry to use.  You want to find some that are a deep purple-red in color, and are nice and plump (there are some varieties where the fruit is ripe when yellow or green, though none of these seem to grow wild in my area, so I am unfamiliar with them, or how well their fruit works for jelly).  The flesh should be firm, if the fruit dents without much pressure from you, it is probably getting too ripe to use.  The fruit is sweet and edible without cooking-but between the thorns and seeds, I prefer to juice it. 
You can collect the fruit from public lands-usually a small amount for personal use is permitted-though if you plan on selling the fruit or products (like jelly) check the regulations.  If collecting on private land, please get permission, and make sure no pesticides or herbicides have been used near the plant.  The time of year the fruit will be ready depends on the weather, the species and your location, but is usually ripe in late July through September.
This fruit comes from a cactus, which makes collecting and handling the it a bit difficult.  The big spines aren't the problem.  You can see and avoid those for the most part-it's the glochids that will make you crazy.  You know, the ones you don't know are stuck in you until you brush your hand against something.  They  don't hurt all that much, but finding them to pull them out? Good luck! (If you do get some in you, try pressing some duct tape down over the spot, then peeling it up.  This will pull up any loose ones, though if you have some that are in deeper, you'll need tweezers...and a magnifying glass.)
Yes, you can use gloves-but trust me, you'll get poked anyway, and you'll end up having to toss the gloves because the glochids get stuck in the gloves, and end up getting in you whenever you use them after that.  I've found the easiest way to get the fruit is to use some kitchen tongs.  They keep your hands out of the way of both the big spines and the glochids.  I suggest you put the fruit in a plastic bucket to further contain the spines.  If it's a bucket you want to use again, you'll need to hose it out, then use something abrasive to get rid of all the spines.  A better idea is to ask your bakery if they have any buckets they are going to toss, some of their frosting and dough comes in buckets.  I've even picked up some at Dairy Queen before.  Then you can just recycle the bucket when you are done.

Processing:
It's always best to use the fruit as soon as possible, though you can probably store it in a cool place for a few days.  Again you need to deal with the glochids-getting some of these in your mouth or throat would not be fun.  Some traditional methods of getting rid of the spines are to roll the fruit in sand, or singe the spines with flame.  I've tried burning off the spines using a candle, but it was time consuming, and it turns out that if you are making jelly, you don't need to remove the spines. After rinsing the fruit with a strong spray of water, I use tongs and a knife to cut each fruit in half.  I put several layers of cheesecloth in the food basket and place the fruit inside.  It helps to clothespin the cheesecloth in place until all the fruit is in the basket.  I've found that you can steam the fruit whole, but it helps to cut the fruit at least once, though you don't need to cut it up much.  I also put a few layers of cheesecloth around the end of the hose to catch any spare glochids that may come through.  The less you disturb the fruit once it is in the basket, the fewer glochids will be released. Follow the instructions from the steamer manual from here.  You'll know you are done when the fruit stops releasing juice.  You can press the fruit at this point if you want, but I don't usually get enough juice to make it worth it.  With most fruits, the jelly looks much clearer and prettier if you don't press the fruit, and I don't want to press any glochids through the cheesecloth with the cactus fruits.
(A few tricks: put a bottle in a drawer next to the stove to catch drips, and so you don't have to handle a hot jar of juice.  Another trick is to put a few marbles in the water pan-they will start to rattle when the water level gets too low, so you can avoid boiling the pan dry-which is bad...Very bad.)

If you don't have a juicer, place the fruits whole into a pot, bring to a boil, and boil for ten minutes.  Mash with a potato masher, then boil for another ten minutes.  Pour juice out through cheesecloth to strain. 


Making Jelly:
Once you have the juice you can make jelly immediately, or you can freeze the juice to make it later.  Find a recipe from a reliable source such as a university extension office or official canning website like Ball or Kerr.  Jelly is a little safer to experiment with than other canning foods, but you don't want to risk wasting your work on something that is potentially dangerous to eat.  Recipes from these sources have been tested for safety.
It always helps if the little ones don't get tired of you cooking and try to push you out of the kitchen.


 This recipe is from Preserving Food in Wyoming: Wild Berries and Other Wild Fruit by the University of Wyoming Cooperative Extension Service, College of Agriculture and Natural Resources, p. 23.  You can find the entire publication here.


Prickly Pear Jelly
3 cups of cactus juice (made from approximately 12 cups ripe cactus fruit)
½ cup lemon juice
1 package of powdered pectin
4½ cups of sugar
Jelly bag or three layers of cheesecloth
 
Mix cactus juice and lemon juice with powdered pectin. Place over high heat and stir until the mixture comes to a rolling boil. Add sugar, bring to a vigorous boil again, and boil for 1½ minutes stirring constantly. Remove from heat, skim off any foam, and pour quickly into hot half-pint or pint jars or hot sterilized half-pint or pint jars leaving ¼-inch headspace. Wipe sealing edge of jars with a clean, damp paper towel. Adjust lids and process in a boiling-water canner, for 10 minutes, adjusting processing time for altitude.  For good instructions on using the water bath canning method, and a chart for adjusting processing times, go here.

If you'd like to make syrup instead of jelly, just omit the pectin, and follow the directions as listed above.

Homemade: A Review of Homemade Laundry Soap


In an effort to be more frugal, I've decided to test the affordability and effectiveness of some homemade products. Powdered homemade laundry detergent seems to be highly praised, so I thought I'd start with that.

Most homemade laundry detergent recipes are similar, so I researched the ingredients to find out why they were added to the recipe. It turns out there are three ingredients that are nearly always included, and several ingredients that are optional. Instead of posting all the recipes I found, I posted a general recipe you can adapt if you decide to make your own.

Recipe for Homemade Laundry Detergent:
Necessary ingredients:
  • 1 cup Borax (Cleans, disinfects, and softens water).
  • 1 cup Arm & Hammer Washing Soda (This is sodium bicarbonate, and alkali salt that breaks down grease and dissolves stains. It softens water by binding with chemicals that cause hard water, allowing the detergent to form more suds and work more effectively).
  • 1 bar of Fels-naptha soap, Pink Zote Soap, Kirk’s Castile unscented soap, or Ivory Soap, just don't use something heavily perfumed. (Cleans).

Optional Ingredients:
  • 1 cup Oxyclean or store brand oxyclean
This is a mixture of washing soda and powdered hydrogen peroxide. The baby version only has these two ingredients, the regular mix has some detergent added. Some people complained of whites gradually getting dingy with homemade detergent. This will counteract that. Some people opted to just add a scoop to whites and loads that were especially grubby to save money.
  • 1 cup box Arm & Hammer Baking Soda
Some recipes include this as a whitener and to make it smell nicer, it also softens water.
  • White Vinegar
Some people claimed using this as a rinse helped remove buildup of hard water residue and killed a musty odor others complained of. Some didn't like the strong smell of vinegar and suggested an extra rinse cycle to get rid of the vinegar smell, though other sites claimed the vinegar smell disappeared after drying. My machine isn't programmable and I'd have to babysit the machine to be able to add the vinegar, if I end up having to do this, it will probably be a deal-breaker for me. Stiff towels are a good indicator that you have too much detergent residue left after the wash.
  • Calgon Powder
This was also suggested as a solution to the buildup of hard-water residue, the suggested amount was around1/2 cup but amount may need to be increased based on how hard your water is.
  • 1/4 cup Cascade dishwashing detergent per load
This detergent contains an enzyme that helps break down protein stains.
      • A few drops of essential oils
      This makes it smell pretty-the favorites are usually citrus or lavender.

      Directions:
      Grate or shred soap with cheese grater or food processor. Mix all ingredients together, and use one-two tablespoons per load using the directions on your machine. This soap can be a little slower dissolving in water than store-bought soap, so it works best to put the soap in the machine and start the water before adding clothes.

      Notes:
      Hot or Cold? Some sites claimed using hot water was essential when using homemade, others claimed cold worked fine, still others claimed you only need hot water for whites. Detergents begin to lose their effectiveness below sixty degrees either commercial or homemade.
      Hard Water? If you have hard water, you will need more detergent-this is true of store-bought detergent as well.
      High Efficiency Machines? I do not have a high-efficiency machine, so I am not aware what special needs these machines have. Some claim that this is not a high-sudsing recipe, so it is ok, but I don't have enough knowledge on this point to make recommendations.
      Pre-treating Stains? Some sites recommend rubbing stains with the Fels-naptha soap, others suggest using Dawn Dishsoap. I haven't tried either method. I think for now I'll stick to presoaking in water and Oxiclean. If I end up testing pre-treatment methods, I'll post the results. I have to pretreat stains for my regular detergent anyway so I don't think it is a reflection on how well this recipe works.
      Want a larger yield recipe? 4 lbs borax (equals about 11 cups), 2 3lb 7oz box washing soda (one 3lb 7 oz box is about 5.5 cups), 11 bars soap.
      Where can I get the ingredients? Most larger supermarkets have these ingredients. I found everything at our small Walmart, though the only bar soaps available there were Fels-naptha soap and Ivory.
      Shredding the soap? Some people complain of the tediousness of hand-shredding the soap, but others said it was no big deal. The soap I was shredding was a little hard to shred by hand-I could have done it but after a few minutes I decided to just do in in the processor. I tried both of the options my little food processor offers, the shaving option came out looking like grated cheddar, the cutting option made it little pea sized lumps. I was hoping for more of a powder to make it easier to mix everything together. I ended up going with the cheese curls, then chopping those down. I think Ivory would powder up better. I don't think shape matters much with effectiveness unless you have chunks too big to dissolve during the wash.

      I tried to anticipate your questions, though this is my first attempt at making the soap. I'll try to answer any other questions you may have, but this is my first attempt too. In a few months, after using up this batch, I will post an updated review. Thanks!

      To sum up:
      When I added everything up, the cost is nearly the same as cheap commercial laundry detergent, and about half that of the nicer brands. If you shop around and find the ingredients at a low price, and use a less expensive bar soap, you may be able to cut the cost of making your own even further than I did. I haven't figured out how to get the $0.01 per load that some makers of their own soap got.
      Homemade worked just as well as store bought, and worked even better when Oxyclean was added. Will I make it again? I was really hoping the cost difference would be greater. I would definitely switch if saved me more money, it was easy enough to make, especially using a food processor, and it does the job.


      Price Comparison:


      Homemade Laundry Detergent
      Cost
      Ounces
      Cups
      Tablespoons (Loads)
      1 4 lb 12 oz box Borax
      $2.98
      76
      11
      110
      2 3 lb 7 oz boxes Arm & Hammer Washing Soda
      $6.48
      110
      11
      110
      11 5.5 oz bars Fels-Naptha Soap, grated
      $10.67
      60.5
      5.5
      55


      Total Cost
      $20.13
      Total Ounces
      246.50
      Cost per Ounce
      $0.08
      Total Tablespoons (Loads)
      275
      Cost per Load
      $0.07


      Regular Tide Detergent 169 oz box, 120 loads

      Total Cost
      $20.47


      Cost per Ounce
      $0.12


      Cost Per Load
      $0.17


      Regular Sun Detergent 85 oz box, 80 loads

      Total Cost
      $4.98


      Cost per Ounce
      $0.06


      Cost per Load
      $0.06


      I added the package totals together to get the total ounces, then I figured ~10 tablespoons detergent per cup, about 27.5 cups for a large batch, so about 275 tablespoons. This is a pretty rough estimate since I didn't measure the amount of detergent precisely, I just wanted to get an idea if the cost was comparable. Ivory Soap was $4.27 for a pack of nine bars, if you used that, your cost would be a bit less.

      Effectiveness:
      Here are the images of the results (apologies for the quality):

      Now, I wasn't expecting stains like these to come clean completely, but I thought it was a quick way to compare cleaning ability. I took some white cotton cloth, and stained strips with soil, ketchup, grass, driveway oil puddle, and soy sauce. I made mini stained quilts and soaked two of them in Oxyclean water for about two hours. Then I washed one the pre-soaked, and one of the un-soaked in two seperate loads. I used hot water for both loads, and added Oxyclean to both loads because I wanted to keep it as close to the way I normally wash as possible. I but added the reccomended amount of Sun brand detergent to one load, and two tablespoons of homemade detergent to the other load. Thinking back I should have made one more and washed it in water for a control. Does your kid need a science fair project?
      I was a little surprised at the results. The winner? Presoaked + Homemade. The looser? Unsoaked Homemade. For some reason, combining Oxyclean presoaking with the homemade detergent yeilded the best results. I was also a bit surprised that the presoaking didn't make as much of a difference as I thought it would, I guess the Oxyclean I added to the wash did nearly the same job as presoaking.
      I'd like to do this test again, without the oxyclean in the wash at all, and try it with a more expensive commercial brand.

      Pretreating Stains:
      Of course I'll have to pretreat stains using homemade detergent, just as I do with store-bought soap.
      Let me explain, no, there is to much. Let me sum up:
      • Work fast if possible, fresh stains come out more easily.
      • Avoid rubbing stains with bar soaps, many stains can be set in by doing this.
      • Avoid heat: if the stain doesn't come out with the first wash, don't put it in the dryer, re-treat and re-wash.
      • Pretreat with a stain remover that contains enzymes if the stain is a protein stain like blood or grass.

      Here is a good site on removing stains.

      Bird Bath

      This is the project that has taken up most of my freetime the past few weeks.  I probably could have gotten it done in a few days if I hadn't been limited to naptimes.  This way of doing it worked out for me though, because it gave me time to leave it alone and come back with a fresh eye. 

      It started with a towel rack that seemed to spend most of its time on the floor waiting for me to find a mini screwdriver and reattach it...again.  I got tired of it and asked for a new one for my birthday.  The new rack was shorter than the original one, so that meant I needed to patch the hole and paint over it.  Instead of trying to match the builder's beige that is through the whole house I thought I'd try a new color. 

      I then happened across some stencils on Pinterest that I fell in love with.  (See?  I don't spend ALL my time pinning things I'll never do...)  While the stencils would have sped up the process considerably, I decided to freehand it to save a little.  Here is the link to Cutting Edge Stencils if you want to do it the easy way.


      Step 1: Select Colors
      Paint chips are nice and everything, but be aware the lovely soft blue-gray you pick out might turn into an awfully bright baby blue on the wall.  Yes I looked at the chip on the wall in the actual room under different light conditions.  I found out the hardware store had an extremely limited supply of test samples, so scratch the idea of getting a base coat and a few darker shades of the same color in sample sizes. Also scratch the idea of getting a sample and painting a patch on the wall first.  Lesson learned.

      On my second attempt I found a color that looked very gray in the store when they dabbed the top of the can.  I almost didn't have the courage to try it on the wall, but compared to the sample I brought in of the baby blue it was the closest to what I had in mind.  I got enough of the lightest shade to cover the walls with a bit left over, and to save money, bought a small can of paint several shades darker and mixed the darker shades myself.  Just to be safe, I painted a patch of each shade I ended up using on a paint stick.  This way I can get a color match if I need to have more paint mixed up.

      Step 2: Paint base coat (again)
      Just as I hoped-the paint looked more of a soft blue when on the wall.  I painted the ceiling a slightly darker color, which matched the color of the lightest branches.

      Step 3: Paint the branches

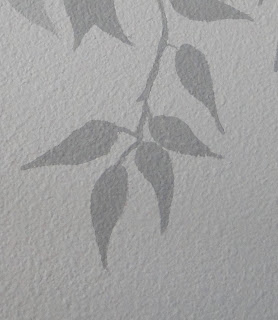
      I found it was easiest to use a soft narrow paintbrush and outline the general shape of the branches and leaves first.  The overall design flowed better when I laid it out on a large scale rather than trying to finish each leaf before moving on.  You can do an outline of the general shape in chalk if you are intimidated by beginning the mural.  Regular chalkboard chalk wipes off easily, though be sure to wait until the paint is completely dry!   It's also easier to start with narrow lines and add to it than try and fix a line that turned out thicker than you wanted.  It took me nearly a week of procrastination before I got up the nerve to start the mural.  The branches look nice with two shades, the lighter going behind the darker.

      A trick I learned in Jr. High from my art teacher: if something in a drawing just looks wrong to you and you can't figure out why, try using a mirror to look at your work.  Your brain will see it as a new image and will more than likely focus on the problem spot you missed earlier because you'd been staring at it too long.


      Step 4: Birds
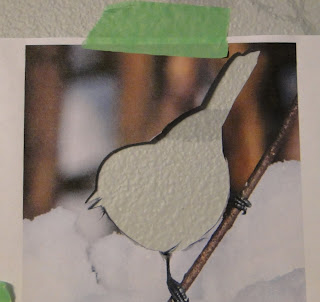
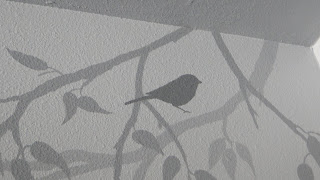
      I wanted the birds to look realistic-we are bird nerds after all.   I could have free-handed the birds, but decided to create some stencils to speed the process up.  I found some images of chickadees (I used a few different species, but the overall shapes were similar enough I thought I could get away with it.  Yes, we are THAT nerdy).  I resized the photos in Microsoft Word so they were nearly life size and then cut them out. (Did you know chickadees are about 5-6 inches from beak to tail? Told ya we were nerdy!)   I only planned on using each stencil once so I used regular copy paper.  If you plan on re-using the stencil, use cardstock, or you could buy some stencil plastic or try contact paper.  Using a very dry brush, I outlined the bird.  A wet brush might leak under the stencil and ruin the lines.  Just dip your brush in the paint and dab most of it off onto a paper towel.  Remove the stencil and fill in the bird.  I didn't try to cut out the feet-these were so thin I just free-handed it again.  Some of the birds needed their feet in a slightly different position to look right on the branch anyway.  If you aren't sure where you want the birds, try taping the bird you cut out to create the stencil on the wall and step back to see if you like the arrangement.

      I did freehand this one, since I couldn't find a wet bird I liked.  I thought it would be funny to have one next to the showerhead.

      Step 5: Touching up
      I found that the paint I selected was opaque enough to make touching up the little mistakes easy.  It was hard to tell if I'd filled in the paint well while it was wet, and the birds looked better once I'd done a second coat.  Some branches were thicker than I liked, some leaves blended together too much so I dabbed in some to create little openings, and I smoothed out a lot of the lines that looked rough from painting on a textured wall.  This mural would have been so much easier on an untextured wall, but it still worked out.


      This bird ended up perched in the air, I must have moved the stencil as I taped it up.  No problem, just extended the branch a bit.


      Sorry about the photographs-it's impossible to really show you how it looks-I just can't back up any more to fit it in.

      The big reveal:  My husband walked in and said "Oh, look!  Chickadees!"  (WHEW!  Mission accomplished!)  I was worried he'd think it was a bit girly, but he liked the colors and the fact that the chickadees were silhouetted instead of painted realistically.  That would have taken me forever.

      Waterwall

      My little buddy is definitely a water baby.
      I thought I might as well encourage some good old scientific inquiry-I mean fun playing in the water.

      Water walls are a frame that holds a variety of containers and tubes that can be rearranged to explore how water moves-and is a great way to cool off on a hot day. It always seems to be the simple things that provide the most fun!


      To make your own waterwall, first construct a frame. I took two 1 1/2" x 3/4" boards, and cut them so the short length would be as wide as a roll of plastic hardware cloth I had. I put two screws in each corner to keep it square and spray-painted it.
      You can skip building a frame and use some pegboard, hang everything on a chain-link fence, or just duct tape everything to a wall. I found one person that used suction cups with hooks on her shower wall.

      For the inside of the frame I stapled some plastic hardware cloth to the frame.
      It turned out the roll wasn't quite as wide as advertized on the package so I had to run three strips across the frame instead of running it the length of the frame. I figured that when the cloth wore out I could easily replace it with something more durable.

      Next you need some containers and something to fasten them to the frame with. I'd saved some plastic containers, and really lucked out at the dollar store where I found some accordion tubes that hook together and hold their shape when bent. (Pop-toobs can be bought here). I cut the containers up, taped the tubes to the bottles and poked holes in various places to create drips. I also found a few tubs at the dollar store to catch (most) of the water. I looked at a lot of options for attaching the containers and tubes to the frame, from wire to Velcro, and finally decided to use pipe cleaners. They added color, were kid friendly, and are easily removable so I can re-arrange things when this configuration gets old.

      My one year old loved it, so mission accomplished.
      I think next time I'll tweak a few things: I didn't think to raise one of the short lengths of board to make a gap for the tubs to go directly under all the dripping. I also think I'll use chicken wire or some metal hardware cloth when I need to replace this though.


      (Safety note: Be sure to secure the frame so it can't tip over on kids, and don't leave kids unattended-I'm sure you are aware toddlers can drown in a few inches of water in a tub like these. You might want to tape over some of the cut plastic edges if they turn out a little sharp.)

      Here are a few blogs that inspired this waterwall:
      Share and Remember Blog
      Let The Children Play
      Pre-School Play

      How to Hack your Swiffer (Because You are Thrifty, or because You are Trying to be Environmentally Responsible)

      I was given a Swiffer Jet mop. It is a lot more convenient than mopping, but I have a hard time paying for the disposable pads and solution. I usually use three pads each time I mop, and it adds up. I'm not terribly fond of their cleaning solution either, it always seems to leave a film on the floor.

      After a little research I found it is easy to make this device more economical and cut down on waste.

      You need a Swiffer Jet or similar wet mop, microfiber cloths, pliers, and a sewing machine or serger.


      When I first got the mop I tried to figure out how to refill the bottle but had given up. It turns out you just need some pliers to give you enough grip to twist the lid off. The first time I tried it the lid came right off, but the second time I refilled it the lid didn't come off as easily, but I got it off eventually. I'm not sure why. Once the lid is off, you can refill it with your favorite floor cleaner, or just use a vinegar-water solution. (If you have hardwood floors, make sure your solution is safe to use on them).

      I bought the thickest microfiber cloths I could find at the dollar store and used an original pad for a guide as to how to fold it. It doesn't matter much if it's a little bigger than the original pad.

      I folded it so the edges were inside, and I surged the sides to hold it together.
      My Swiffer has some Velcro that holds the pad on, if your mop doesn't have this, you could sew some elastic to the pad to hold it to the mop. Microfiber sticks well to the Velcro, but you could use elastic to hold a pad made out of other fabrics, like old towels to the mop.

      The homemade pads are machine washable, and you can flip them over once one side gets dirty. After testing the new pads, I decided to sew across the pad a few times to keep all the layers together. The microfiber worked so much better than the disposable pads ever did, and I only ended up using one (flipping it over once) instead of the three disposable pads I usually use.

      I'm feeling so thrifty and eco-friendly right now! Now I just need a steamer mop...

      Quick Quiet Books

      I'm working on an overly ambitious quiet book but in the meantime I wanted a few quiet books for my little buddy. I just used what I had around the house, and this is what I came up with.

      Changeable Albums
      I have two little accordion style photo albums I'd picked up on clearance ages ago but hadn't done anything with, so in one book I put pictures of grandparents and our family, with the idea I could teach him names, especially of those who don't live close. I had an extra spot so I put in a picture of the cats too. :) The other book I cropped some pictures of him so I had a closeup of his eyes, nose, mouth, hands, and ears, and one picture of his face. Once he learns these words, we can change the pictures to teach him colors, numbers, etc. He likes looking at these, and likes playing with the snap. I thought I'd also pick up a few mini photo albums and put cut out pictures from magazines, or put postcards in them. They will hold his interest longer if some of the pictures change occasionally.

      Magazine Saver

      Little Buddy likes reading his magazine but insists on turning pages himself. He does pretty well for a one-year-old, but in the meantime I've been putting his magazine into sheet protectors to help it last until the next month's issue. I simply cut the magazine along the fold line, and insert one page into each protector. I used heavy weight sheets and this has worked well. I keep a few favorite pages from each issue and just leave those at the back, and I've been saving some of the coloring and activity pages for when he's older. I also save a few pictures for clip art and projects before recycling the rest. This magazine is available online so I can always go back and get copies of stories, so I don't feel bad cutting it up. Judging by how often the stacks of magazines get touched in our library, I feel I'm getting more out of it this way.

      Temporary Sandbox


      Problem: Our backyard isn't so toddler friendly at the moment, so I thought a little sandbox would give my little buddy something to do while I worked back there. We aren't ready to put something in permanently and I wanted something cheap but functional until then.

      Oh, did I mention we have a cat problem?

      We have a cat Problem. There is a feral colony that gets fed at the vacant trailer behind us. I have yet to convince the cats my square-foot garden isn't just a glorified litter box, and the last thing I wanted was buried treasure in this sand, so the number one priority of a sandbox was that it has a lid.

      This is what I came up with:
      Smallest kiddie pool at K-mart: $8.00
      Sand: free from the side of the road. We have a lot of fine grain sand here!
      Cover: $2.00 for the doohickie that holds the string tight. The waterproof fabric was from Freecycle (yeah Freecycle!)
      Little Buddie's smile: Priceless!


      If you were wondering how I made the cover, I laid out the fabric and traced around the upside-down pool about five inches out from the edge.
      I sewed a fold around the edge and threaded the string through using a safety pin. I decided the string was too light so I tied some heavier string to the light string and pulled it through, and threaded the ends through one of those thingamabobs that hold string tight. I'm sure they have a real name but I can't think of it right now. I found them with the buttons at W mart.


      There cat problem solved. Did I mention we have a cat problem?