It started with a towel rack that seemed to spend most of its time on the floor waiting for me to find a mini screwdriver and reattach it...again. I got tired of it and asked for a new one for my birthday. The new rack was shorter than the original one, so that meant I needed to patch the hole and paint over it. Instead of trying to match the builder's beige that is through the whole house I thought I'd try a new color.
I then happened across some stencils on Pinterest that I fell in love with. (See? I don't spend ALL my time pinning things I'll never do...) While the stencils would have sped up the process considerably, I decided to freehand it to save a little. Here is the link to Cutting Edge Stencils if you want to do it the easy way.
Step 1: Select Colors
Paint chips are nice and everything, but be aware the lovely soft blue-gray you pick out might turn into an awfully bright baby blue on the wall. Yes I looked at the chip on the wall in the actual room under different light conditions. I found out the hardware store had an extremely limited supply of test samples, so scratch the idea of getting a base coat and a few darker shades of the same color in sample sizes. Also scratch the idea of getting a sample and painting a patch on the wall first. Lesson learned.
On my second attempt I found a color that looked very gray in the store when they dabbed the top of the can. I almost didn't have the courage to try it on the wall, but compared to the sample I brought in of the baby blue it was the closest to what I had in mind. I got enough of the lightest shade to cover the walls with a bit left over, and to save money, bought a small can of paint several shades darker and mixed the darker shades myself. Just to be safe, I painted a patch of each shade I ended up using on a paint stick. This way I can get a color match if I need to have more paint mixed up.
Step 2: Paint base coat (again)
Just as I hoped-the paint looked more of a soft blue when on the wall. I painted the ceiling a slightly darker color, which matched the color of the lightest branches.
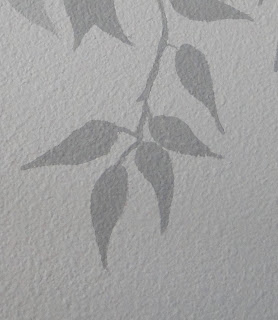
 I found it was easiest to use a soft narrow paintbrush and outline the general shape of the branches and leaves first. The overall design flowed better when I laid it out on a large scale rather than trying to finish each leaf before moving on. You can do an outline of the general shape in chalk if you are intimidated by beginning the mural. Regular chalkboard chalk wipes off easily, though be sure to wait until the paint is completely dry! It's also easier to start with narrow lines and add to it than try and fix a line that turned out thicker than you wanted. It took me nearly a week of procrastination before I got up the nerve to start the mural. The branches look nice with two shades, the lighter going behind the darker.
A trick I learned in Jr. High from my art teacher: if something in a drawing just looks wrong to you and you can't figure out why, try using a mirror to look at your work. Your brain will see it as a new image and will more than likely focus on the problem spot you missed earlier because you'd been staring at it too long.

Step 4: Birds
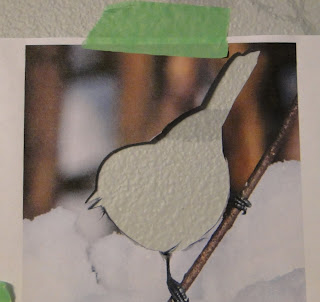
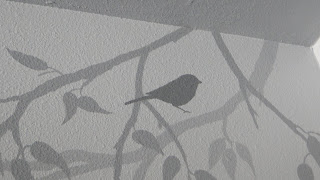
I wanted the birds to look realistic-we are bird nerds after all. I could have free-handed the birds, but decided to create some stencils to speed the process up. I found some images of chickadees (I used a few different species, but the overall shapes were similar enough I thought I could get away with it. Yes, we are THAT nerdy). I resized the photos in Microsoft Word so they were nearly life size and then cut them out. (Did you know chickadees are about 5-6 inches from beak to tail? Told ya we were nerdy!) I only planned on using each stencil once so I used regular copy paper. If you plan on re-using the stencil, use cardstock, or you could buy some stencil plastic or try contact paper. Using a very dry brush, I outlined the bird. A wet brush might leak under the stencil and ruin the lines. Just dip your brush in the paint and dab most of it off onto a paper towel. Remove the stencil and fill in the bird. I didn't try to cut out the feet-these were so thin I just free-handed it again. Some of the birds needed their feet in a slightly different position to look right on the branch anyway. If you aren't sure where you want the birds, try taping the bird you cut out to create the stencil on the wall and step back to see if you like the arrangement.
I did freehand this one, since I couldn't find a wet bird I liked. I thought it would be funny to have one next to the showerhead.
Step 5: Touching up
I found that the paint I selected was opaque enough to make touching up the little mistakes easy. It was hard to tell if I'd filled in the paint well while it was wet, and the birds looked better once I'd done a second coat. Some branches were thicker than I liked, some leaves blended together too much so I dabbed in some to create little openings, and I smoothed out a lot of the lines that looked rough from painting on a textured wall. This mural would have been so much easier on an untextured wall, but it still worked out.

This bird ended up perched in the air, I must have moved the stencil as I taped it up. No problem, just extended the branch a bit.
Sorry about the photographs-it's impossible to really show you how it looks-I just can't back up any more to fit it in.
The big reveal: My husband walked in and said "Oh, look! Chickadees!" (WHEW! Mission accomplished!) I was worried he'd think it was a bit girly, but he liked the colors and the fact that the chickadees were silhouetted instead of painted realistically. That would have taken me forever.


Dear Pamela. Birds are not girlie. Love, Sara
ReplyDeleteThanks Sara, I feel better now!
ReplyDeleteThis turned out so pretty!
ReplyDeleteThis came out lovely ... It reminds me of my dresser makeover inspired from wall decals ... I free handed it too (of course I couldn't wait for a decal to come through the mail). I must admit your much better at the free handing thing. Nice work!
ReplyDeleteHi Pamela ... Looks very good. I bought this stencil and plan to use it in my entry if/when I ever get the old wall paper off and the walls painted. Hope mine turns out half as good as yours and then I will be pleased. I could never free-hand it. Thankful for a stencil.
ReplyDeleteBlessings. Audrey Z @ Timeless Treasures.
http://audreyzumwalt.blogspot.com/